DSWaveformImage: native waveform rendering for Apple platforms
Generate waveform images from audio files on iOS, macOS & visionOS in Swift. Native SwiftUI & UIKit views.
At a glance
- What is it?
- DSWaveformImage is an MIT-licensed Swift package that renders audio waveforms on iOS, iPadOS, macOS, visionOS and Mac Catalyst, in three layers ranging from ready-made SwiftUI and UIKit views to a raw drawer that returns an image or normalized samples. The judgement is that its real strength is the renderer and style protocol rather than the default picture, and that the release numbering implies a long history of gradual renames you need to read before upgrading.
- Who is it for?
- DSWaveformImage fits an Apple platform developer who needs a waveform inside a SwiftUI or UIKit view, wants to pick among linear, circular and stereo renderers with gradient, striped or spectral tint styling, and would rather not hand-roll an FFT and a draw loop. It does not fit a project outside the Apple ecosystem, since the whole package is Swift with UIKit, SwiftUI and AVFoundation types, and it does not fit a cross-platform app that also ships on Android or the web.
- Can I use it commercially?
- Yes. MIT is a permissive licence: you can use, modify and sell software built on it, as long as you keep its copyright and licence notices.
- Is it still maintained?
- Yes. The repository last received commits 175 days ago.
- What is it written in?
- Mainly Swift, according to GitHub's language statistics.
Answers come from the project's GitHub data, last synced on November 7, 2026, and from our analysis. They are not legal advice.
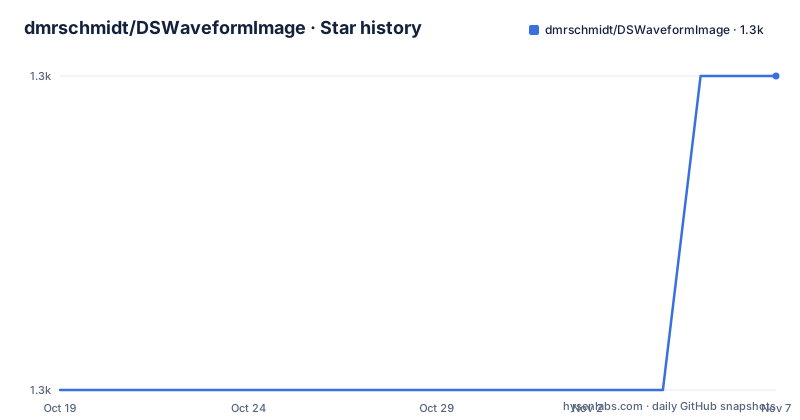
Star history
- dmrschmidt/DSWaveformImage1,267 ★ · +1
| Repository | 2026-10-19 | 2026-11-07 |
|---|---|---|
| dmrschmidt/DSWaveformImage | 1.3k | 1.3k |
1 Stars in the last 19 days, measured from the daily GitHub snapshot. Compare with other projects
Editorial analysis
Three layers, and you choose how deep to go
DSWaveformImage renders audio waveforms natively on iOS, iPadOS, macOS, visionOS and Mac Catalyst. The package is split into three layers, and the choice of layer is the first design decision you make.
The top layer is SwiftUI views. `WaveformView` is the main one, `WaveformLiveCanvas` handles live capture, and `WaveformShape` exposes the waveform as a shape for custom drawing. The middle layer is UIKit views, with `WaveformImageView` and `WaveformLiveView` for code that has not moved to SwiftUI. The bottom layer is the raw API: `WaveformImageDrawer` renders to a `UIImage` or `NSImage`, and `WaveformAnalyzer` hands you the normalized `[Float]` samples so you can do your own thing with them.
That layering is the right shape for a library like this, because the same problem appears in three situations. You want a drop-in view in a SwiftUI screen, you have a UIKit view controller and want a drop-in view there, or you want the numbers to drive something else entirely, a custom renderer, a print layout, a share sheet.
The imports reflect the split, and the views module is optional:
import DSWaveformImage       // core: drawer, analyzer, renderers, types
import DSWaveformImageViews  // UIKit + SwiftUI views (optional)
The `Example/` directory holds a multi-platform gallery, and the `WaveformGalleryView` in it exercises every public surface interactively. There are separate example projects for iOS, macOS and visionOS plus a shared directory, which tells you the same code really does run across these platforms.
Adding the package and drawing a first waveform
Installation is through Swift Package Manager, and the README gives the repository URL with a version rule:
https://github.com/dmrschmidt/DSWaveformImage (Up to Next Major from 14.0.0)The parenthetical matters. The rule permits versions up to but not including the next major after 14.0.0, which means your integration will pick up minor and patch releases but will not silently take a major version with breaking changes. For a library that is still changing its API, that is a sensible default for an app you ship.
The SwiftUI path is a single expression:
WaveformView(audioURL: url)The UIKit path sets a property on a view instance:
let view = WaveformImageView(frame: .init(x: 0, y: 0, width: 500, height: 300))
view.waveformAudioURL = url
And the raw image path is asynchronous and throws:
let image = try await WaveformImageDrawer().waveformImage(
    fromAudioAt: url,
    with: .init(size: size, style: .filled(.black))
)
The `try await` on the drawer is the signal about how the work is scheduled. Analysing an audio file and reducing it to a waveform is not something to do on the main thread, and the asynchronous API is the library telling you so. The view types presumably handle that internally, which is the reason to use them rather than the drawer.
The package also has a `Package.swift` at the root, a `Tests/` directory, a `.swiftlint.yml` for lint configuration, an `.ios_toolchain.yml` and a `.swiftpm/` directory. The `Promotion/` directory holds the images used in the README.
Renderers and styles are separate axes
The rendering model has two independent dimensions, and separating them is what makes the library flexible rather than a set of fixed presets.
On the renderer axis, `LinearWaveformRenderer` is the default and draws a horizontal 2D amplitude envelope. Its `sides` option controls which side of the centreline the envelope occupies, with `.both`, `.up` and `.down`. `CircularWaveformRenderer` wraps the same envelope around a circle, with `.circle` filling the disk and `.ring(innerFraction)` cutting a hole to produce an annulus.
WaveformView(audioURL: url, renderer: LinearWaveformRenderer())            // default
WaveformView(audioURL: url, renderer: LinearWaveformRenderer(sides: .up))  // top-only
WaveformView(audioURL: url, renderer: LinearWaveformRenderer.stereo) // stereoWaveformView(audioURL: url, renderer: CircularWaveformRenderer(kind: .circle))
WaveformView(audioURL: url, renderer: CircularWaveformRenderer(kind: .ring(0.5)))On the style axis, `Waveform.Style` controls how the envelope is drawn, and the same renderer works with any of them: `.filled`, `.outlined`, `.gradient`, `.gradientOutlined` and `.striped`.
.filled(.indigo)
.outlined(.indigo, 1.5)
.gradient([.blue, .purple])
.gradientOutlined([.blue, .purple], 1.5)
.striped(.init(color: .indigo, width: 3, spacing: 3))
If none of the built-in renderers fit, you can implement your own by conforming to the `WaveformRenderer` protocol, whose source is at `Sources/DSWaveformImage/Renderers/WaveformRenderer.swift`.
Spectral tint colours columns by their centroid
The most interesting feature is the spectral tint, and it works on the same amplitude envelope rather than replacing it.
`.spectralTint(low:high:)` colours each amplitude column by its spectral centroid. Bass-heavy columns get the `low` colour, treble-heavy columns get the `high` colour, and the interpolation in between is smooth. The envelope shape stays identical to the non-spectral path; only the fill follows the audio's frequency content over time.
WaveformView(audioURL: url, configuration: .init(
    style: .spectralTint(low: .systemBlue, high: .systemRed)
))
The catch is that not every renderer can do this. Renderers that opt in to spectral data conform to `SpectralAwareWaveformRenderer`, and ones that do not fall back to filling with the `low` colour. `LinearWaveformRenderer` conforms by default.
That fallback is silent from the caller's point of view. If you switch to a custom renderer and forget to conform to the spectral protocol, the waveform still draws, still uses the same envelope, and simply loses the frequency information without telling you. If the spectral tint is the point of your integration, the conformance is the thing to check.
The feature is a natural fit for a waveform in a music or podcast app, where the visual difference between a bass-heavy intro and a bright chorus is exactly the information a listener might want to see at a glance.
Channel selection lives on the renderer, not the configuration
One API decision is worth understanding before you wire this up, because it is the kind of placement that surprises people.
Channel handling lives on the renderer, not on `Configuration`. The `channelSelection` option has three cases. `.merged` is the default and sums all channels, `.specific(index)` picks one channel, and `.stereo` is treated as its own thing rather than an index.
LinearWaveformRenderer(channelSelection: .merged)        // default
LinearWaveformRenderer(channelSelection: .specific(0))   // left only
LinearWaveformRenderer(channelSelection: .specific(1))   // right only
The documentation also notes the split: when you are calling `WaveformAnalyzer` directly for raw samples, you pass `channelSelection` there instead. So the option lives in two different places depending on which layer you are at. If you configure it on the renderer and then call the analyzer, the setting does not carry over, and vice versa.
Stereo has its own semantics again. `LinearWaveformRenderer.stereo` interprets a sample array laid out as all left samples followed by all right samples as left on top and right on bottom, in a single image, and it works with the style system as usual:
WaveformView(audioURL: url, configuration: .init(
    style: .gradient([.blue, .red])
), renderer: LinearWaveformRenderer.stereo)
The `.stereo` factory is a distinct thing from `.specific(0)` and `.specific(1)`. One draws two channels in one image, the other picks one channel and draws it.
Amplitude scaling and damping change what the picture means
Two options affect the semantics of the image rather than its appearance, and both are easy to get wrong.
`Waveform.AmplitudeScaling` decides how sample loudness maps to the canvas. `.absolute` is the default and uses a fixed `0 dBFS` reference, so quiet recordings render visibly smaller than loud ones and loudness across files is preserved. `.normalized` shifts the file's peak to the canvas edge, so every clip fills the canvas regardless of its recording level while preserving the envelope shape.
.init(style: .filled(.indigo), amplitudeScaling: .normalized)The choice matters when you display several files in a list. With `.absolute`, a quiet recording looks quiet, which is informative. With `.normalized`, every waveform fills its cell and looks equally loud, which is prettier and hides the information. The default of `.absolute` is the honest one, and the normalized mode is a deliberate presentation choice rather than a default.
`Waveform.Damping` fades the envelope toward zero at one or both ends:
.init(style: .filled(.indigo), damping: .init(percentage: 0.18, sides: .both))The documentation describes it as useful for live capture, where the leading and trailing edge would otherwise look like a hard cut, and it accepts a custom `easing:` closure to shape the falloff, with the example `{ x in pow(x, 4) }`.
Between the two, these options are what separate a waveform that is decorative from one that is a faithful representation of the audio, and both are one enum away.
A long release history under one version number
The maintenance picture needs reading carefully, because the numbers do not tell the usual story.
The listed releases are 14.3.0 on 2026-01-22, 14.4.0 on 2026-05-14 and 14.5.0 on 2026-05-16, and the 14.3.0 release note is descriptive: allow passing AVAsset to the waveform analyzer. The last push was on 2026-05-17, the day after 14.5.0, and the repository is not archived.
So the package is at version 14 and the last change was in May 2026. A major version of 14 for a library of this size means the API has been through a lot of renames and reorgansations, and the current layering into `DSWaveformImage` and `DSWaveformImageViews` with the renderer protocol is the result of that history. Anyone arriving from an older snippet on the web is likely to be looking at a different API, and the `WaveformView` initialiser signature with `audioURL:`, `configuration:` and `renderer:` is not what older versions took.
The `AVAsset` change in 14.3.0 is the kind of small API addition that is worth noticing. Passing an asset rather than a URL means you can analyse media you already have in memory, for example a recording you just captured, rather than something that had to be written to disk first. That is a real workflow improvement for a live capture feature, and it pairs with the `WaveformLiveCanvas` and `WaveformLiveView` types.
The licence is MIT with a `LICENSE` file at the repository root, so the package can be vendored into a closed-source app without an obligation to publish. That is a licensing observation rather than legal advice, and the `LICENSE` file governs. The repository also carries `CODE_OF_CONDUCT`-style community files indirectly through its `.github/` directory, a `.ruby-version` and a `.swiftpm/` directory.
Editorial conclusion
DSWaveformImage fits an Apple platform developer who needs a waveform inside a SwiftUI or UIKit view, wants to pick among linear, circular and stereo renderers with gradient, striped or spectral tint styling, and would rather not hand-roll an FFT and a draw loop. It does not fit a project outside the Apple ecosystem, since the whole package is Swift with UIKit, SwiftUI and AVFoundation types, and it does not fit a cross-platform app that also ships on Android or the web. Verify first that the API you are calling matches the version you are on, because the release notes for 14.3.0 describe allowing an AVAsset to be passed to the analyzer, that the `WaveformRenderer` protocol is what you conform to for a custom renderer, and that the `spectralTint` style actually changes anything for you, since renderers that do not opt in to spectral data fall back to filling with the `low` colour.
Frequently asked questions
How do I add DSWaveformImage to a Swift project?
Add it through Swift Package Manager using the repository URL `https://github.com/dmrschmidt/DSWaveformImage` with the rule up to the next major from 14.0.0, then import `DSWaveformImage` for the core API and `DSWaveformImageViews` for the SwiftUI and UIKit views.
How do I show a waveform in SwiftUI with DSWaveformImage?
Pass the audio URL to `WaveformView`, for example `WaveformView(audioURL: url)`. You can then supply a `renderer` such as `LinearWaveformRenderer()` or `CircularWaveformRenderer(kind: .ring(0.5))` and a `configuration` holding the style.
What is the difference between amplitudeScaling absolute and normalized in DSWaveformImage?
`.absolute` is the default and uses a fixed `0 dBFS` reference, so quiet recordings render smaller and loudness is preserved across files. `.normalized` shifts each file's peak to the canvas edge so every clip fills the canvas regardless of recording level, while keeping the envelope shape.
Does the spectralTint style work with every DSWaveformImage renderer?
No. Renderers must conform to `SpectralAwareWaveformRenderer` to use spectral data, and `LinearWaveformRenderer` conforms by default. A renderer that does not opt in falls back to filling with the `low` colour.
How do I get the raw waveform samples in DSWaveformImage?
Use `WaveformAnalyzer`, which returns normalized `[Float]` samples. When calling it directly you pass `channelSelection` to the analyzer rather than to a renderer, since channel handling lives on the renderer in the view layers.
Official sources
Add this badge to your README
If you maintain this project, the badge below links readers to this analysis and shows its maintenance status from the daily GitHub snapshot. Paste the markdown into your README; add ?metric=license or ?metric=stars to the image URL for a different field.

[](https://hysenlabs.com/projects/dmrschmidt-dswaveformimage)Star history chart for your README
[](https://hysenlabs.com/projects/dmrschmidt-dswaveformimage)Was this useful?