Deep Snake: the CVPR 2020 code for contour-based real-time instance segmentation
Code for "Deep Snake for Real-Time Instance Segmentation" CVPR 2020 oral
At a glance
- What is it?
- This repository holds the code for Deep Snake for Real-Time Instance Segmentation, a CVPR 2020 oral paper that reframes instance segmentation as a contour regression problem solved with a convolutional neural network. It ships pretrained weights, config files and training scripts for Cityscapes, KITTI and SBD, and its dependencies are pinned to a 2018 vintage of NumPy and OpenCV.
- Who is it for?
- Adopt this repository if you are reproducing the Deep Snake paper, you need its pretrained weights for a benchmark, or you are studying contour-based instance segmentation. Do not adopt it as a production segmentation library, because it is a research codebase pinned to a 2018 dependency set and it is not packaged for installation.
- Can I use it commercially?
- Check first. The repository uses a licence we do not classify automatically, so read its LICENSE file before any commercial use.
- Is it still maintained?
- Yes. The repository last received commits 54 days ago.
- What is it written in?
- Mainly Jupyter Notebook, according to GitHub's language statistics.
Answers come from the project's GitHub data, last synced on November 7, 2026, and from our analysis. They are not legal advice.
Star history
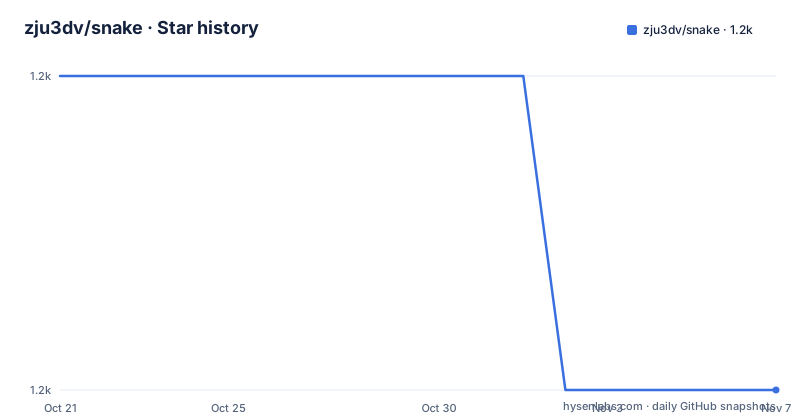
- zju3dv/snake1,189 ★ · -1
| Repository | 2026-10-21 | 2026-11-07 |
|---|---|---|
| zju3dv/snake | 1.2k | 1.2k |
-1 Stars in the last 17 days, measured from the daily GitHub snapshot. Compare with other projects
Editorial analysis
The idea: instance segmentation as contour regression
Deep Snake for Real-Time Instance Segmentation is a CVPR 2020 oral paper by Sida Peng, Wen Jiang, Huaijin Pi, Xiuli Li, Hujun Bao and Xiaowei Zhou, and the repository is the code that accompanies it, with the paper linked as an arXiv PDF at 2001.01629.
The framing is what makes the work worth reading rather than just running. Rather than treating instance segmentation as detection followed by per-instance mask classification, the approach reframes the problem as a contour regression problem, and it solves it with a convolutional neural network that predicts a distance field over the whole image, from which the individual instance contours are recovered. The representation is continuous rather than a discrete mask, which is what makes real-time behaviour plausible, and it is the reason the repository carries a demo mode and a speed mode alongside the evaluation mode.
The primary language of the repository is listed as Jupyter Notebook, which is a slightly odd signal and worth explaining. The tree contains demo.ipynb and a demo_images/ directory, so the notebook is the interactive entry point for looking at results, while the actual pipeline is Python: run.py for inference and evaluation, train_net.py for training, lib/ for the library code, configs/ for the configuration files, tools/ for helper scripts, data/ for the model directory, and external/ for third-party code. A requirements.txt and an INSTALL.md complete the picture, and there is a project_structure.md that the README points to for the training parameters.
The repository is not archived and the last push was on 2026-09-15, so someone is still touching it. There are no GitHub releases, which is normal for a paper repository where the artefacts are the paper and the weights rather than a distributed package.
At the top of the README there is also a pointer to a follow-up: the authors note that Snake algorithms exhibit state-of-the-art performances on the COCO dataset, linking to DANCE, a deep attentive contour model for efficient instance segmentation from WACV 2021. That is worth knowing before you start, because it tells you the line of work continued past this paper and a reader who wants the current state of contour methods would want to look there too.
One script, three modes, and a config file per dataset
The whole project is driven by a single entry point, run.py, with a --type flag that selects the mode, and a --cfg_file that selects the experiment. The modes are evaluate, network, visualize and demo.
The evaluate mode runs the evaluation, and there is a distinction between the COCO evaluator and a dataset's own official evaluator. On Cityscapes:
# use coco evaluator
python run.py --type evaluate --cfg_file configs/city_rcnn_snake.yaml
# use the cityscapes official evaluator
python run.py --type evaluate --cfg_file configs/city_rcnn_snake.yaml test.dataset CityscapesVal
The network mode measures speed, which is the point of the whole real-time claim:
python run.py --type network --cfg_file configs/city_rcnn_snake.yamlOn KITTI and SBD the same pattern applies with the dataset name appended for evaluation and speed, using configs/kins_snake.yaml and configs/sbd_snake.yaml with test.dataset KinsVal and test.dataset SbdVal. The trailing key and value are a dotted-path override into the configuration, so the mechanism generalises to any config key rather than being special-cased for datasets.
Visualization follows the same shape and adds a ct_score parameter, a contour threshold, set to 0.3 in every example:
# Visualize Cityscapes test set
python run.py --type visualize --cfg_file configs/city_rcnn_snake.yaml test.dataset CityscapesTest ct_score 0.3
The demo mode is the one for a quick look, and it supports both a single image and a folder of images, with the same trailing overrides:
python run.py --type demo --cfg_file configs/sbd_snake.yaml demo_path demo_images ct_score 0.3
# or
python run.py --type demo --cfg_file configs/sbd_snake.yaml demo_path demo_images/2009_000871.jpg ct_score 0.3
The config files are the actual experiment definitions, and the yacs dependency in requirements.txt is the configuration library, which explains the YAML with dotted-path overrides and the ability to set a model and a dataset independently.
Getting the weights, and where each checkpoint goes
The pretrained models are hosted on Google Drive, and the README is precise about the paths, which differ per dataset because they reflect different stages of the pipeline.
For Cityscapes the checkpoint goes to $ROOT/data/model/rcnn_snake/long_rcnn/197.pth, and the rcnnn_snake, long_rcnn and 197 parts of that path are the task, the backbone variant and the training iteration. For KITTI it is $ROOT/data/model/snake/kins/149.pth, and for SBD it is $ROOT/data/model/snake/sbd/149.pth, so the snake task with iteration 149 against a different dataset directory.
The difference between the Cityscapes path and the other two is not cosmetic. The Cityscapes configuration is city_rcnn_snake.yaml, which pairs the snake head with a Mask R-CNN detector, and the directory name long_rcnn reflects that. The KITTI and SBD configurations are kins_snake.yaml and sbd_snake.yaml, with a snake directory that holds the direct model.
This tells you something about the training story, which the README spells out in the training section. On Cityscapes the training is two-stage: first train the detector alone, and then train the detector and the snake together. The commands are:
# Train the detector
python train_net.py --cfg_file configs/city_ct_rcnn.yaml model rcnn_det
# Train the detector and snake together
python train_net.py --cfg_file configs/city_rcnn_snake.yaml model rcnn_snake det_model rcnn_det
The second command takes a det_model argument pointing at the detector trained in the first step, which is the concrete form of the two-stage recipe. The other two datasets train in a single command, without a detector stage:
python train_net.py --cfg_file configs/kins_snake.yaml model kins_snake
python train_net.py --cfg_file configs/sbd_snake.yaml model sbd_snake
Training progress is visible through tensorboard, with the log directory named after the task:
# for the rcnn_snake task
tensorboard --logdir data/record/rcnn_snake
# for the snake task
tensorboard --logdir data/record/snake
So the two log directories correspond to the two configurations, and the naming convention lines up with the model paths from the testing section.
The dependency floor, which is the real obstacle in 2026
The requirements.txt is short, and every line of it is a decision you will have to make about your environment.
yacs==0.1.4
numpy==1.16.4
tqdm==4.28.1
opencv-contrib-python==3.4.2.17
opencv-python==3.4.2.17
imgaug==0.2.9
pycocotools==2.0.0
Pillow
tensorboardX==1.2
NumPy is pinned to 1.16.4, which was released in late 2018, and OpenCV is pinned to 3.4.2.17 from the same period. These are not the versions anyone would choose today. NumPy 1.16 does not build against a current Python, and OpenCV 3.4 predates the changes in the Python bindings that came later.
That is the practical obstacle for adoption, and it is a bigger one than the code itself. The environment these pins imply is a Python 3.6 or 3.7 era interpreter, and the pieces of modern Python that have moved on, the distutils removal, the Cython changes in NumPy, are exactly the kind of thing that breaks an old pin in a new interpreter. A container with a pinned base image is the practical answer, and the INSTALL.md file is what the README points to for the setup steps, so that document holds the details this summary does not.
The imgaug dependency is worth flagging for a second reason, separate from the version. It is the augmentation toolkit the training pipeline uses, so it sits in the critical path of training rather than being optional. The pycocotools and Pillow entries handle dataset reading and image handling, and tensorboardX is the tensorboard integration for the training logs.
None of this is a criticism of the project. A 2020 conference paper with reproducible code should pin its environment, and pinning is the right call for reproducing a specific set of results. The point for a modern adopter is that running this code is an archaeology exercise, and that the results you reproduce will be the results the paper reported only if you reproduce the environment as well as the weights.
What this repository is for, and when it is the wrong tool
There are three limits, and the first is about what kind of project this is.
The first is that this is a research codebase released with a paper, not a maintained library. There is no package on PyPI to install, no API stability promise, no semantic versioning, and no continuous integration described in the README. The intended use is reproducing the paper's numbers, running the demo, and using the pretrained weights as a baseline or a starting point for your own work. If you are building an instance segmentation system for production, this is a reference implementation, and you would be forking research code and owning it from there.
The second is that the environment is frozen in 2018, as the previous section sets out. This is the limit that will decide whether you can run it at all, and the answer depends on whether you can build a legacy Python environment. A team with a modern standard and no appetite for container archaeology will spend more time on the dependency floor than on the model.
The third is the model itself, and it is a design trade rather than a defect. A contour-based representation is a departure from the mask-based approach that most instance segmentation systems use, and the paper's argument is that this is what makes real-time behaviour achievable. That argument came with a real-time claim attached to it, and the repository's own --type network mode is there to measure it.
The alternative approach for a practitioner is a maintained segmentation library, whether that is a Mask R-CNN or a Mask2Former implementation in a framework you already run, or a general segmentation toolkit. The difference in approach is exactly the point of this paper: those methods predict masks, and this one predicts contours, and the contour representation is what makes the real-time budget reachable. The mask-based route is better served by code that is maintained, documented and packaged, and it does not require a 2018 Python.
So the deciding question is whether you want to reproduce this result or use this approach. Reproducing, or using the weights as a baseline in a research setting where the environment can be frozen, and this repository is exactly right. Shipping an instance segmentation service on top of it, and it is the wrong shape.
Editorial conclusion
Adopt this repository if you are reproducing the Deep Snake paper, you need its pretrained weights for a benchmark, or you are studying contour-based instance segmentation. Do not adopt it as a production segmentation library, because it is a research codebase pinned to a 2018 dependency set and it is not packaged for installation. Verify first that the Python version you have can satisfy numpy==1.16.4 and opencv-python==3.4.2.17, that you can reach the Google Drive folder holding the checkpoints, and that the evaluation scripts produce the numbers you expect on your own hardware before you cite them.
Frequently asked questions
What is the zju3dv/snake repository for?
It holds the code for Deep Snake for Real-Time Instance Segmentation, a CVPR 2020 oral paper by Peng, Jiang, Pi, Li, Bao and Zhou that reframes instance segmentation as contour regression, with pretrained weights and configs for Cityscapes, KITTI and SBD.
How do I evaluate Deep Snake on Cityscapes?
Put the pretrained checkpoint at $ROOT/data/model/rcnn_snake/long_rcnn/197.pth and run `python run.py --type evaluate --cfg_file configs/city_rcnn_snake.yaml` for the COCO evaluator, or add `test.dataset CityscapesVal` to use the Cityscapes official evaluator.
How is Deep Snake trained?
On Cityscapes it is two-stage: train the detector with `python train_net.py --cfg_file configs/city_ct_rcnn.yaml model rcnn_det`, then train the detector and the snake together with `python train_net.py --cfg_file configs/city_rcnn_snake.yaml model rcnn_snake det_model rcnn_det`. KITTI and SBD train in a single command with their own config files.
What are the Python dependencies for the Deep Snake code?
requirements.txt pins yacs==0.1.4, numpy==1.16.4, tqdm==4.28.1, opencv-contrib-python==3.4.2.17, opencv-python==3.4.2.17, imgaug==0.2.9, pycocotools==2.0.0, Pillow and tensorboardX==1.2, all of which are from a 2018-era software stack.
Official sources
Add this badge to your README
If you maintain this project, the badge below links readers to this analysis and shows its maintenance status from the daily GitHub snapshot. Paste the markdown into your README; add ?metric=license or ?metric=stars to the image URL for a different field.

[](https://hysenlabs.com/projects/zju3dv-snake)Star history chart for your README
[](https://hysenlabs.com/projects/zju3dv-snake)Was this useful?