vivado-risc-v: a RISC-V Linux server that boots on an FPGA board
Xilinx Vivado block designs for FPGA RISC-V SoC running Debian Linux distro
At a glance
- What is it?
- This repository turns a supported FPGA board into a RISC-V SoC running Debian, with OpenSBI, U-Boot, a Linux kernel and a root filesystem on an SD card, and a Makefile that drives the whole flow from bitstream to boot. Some boards need a licensed Vivado, and the workstation needs 32 GB.
- Who is it for?
- vivado-risc-v fits a hardware engineer who needs a real RISC-V Linux system with networking and package access on an FPGA, who wants the whole stack in one repository rather than assembling OpenSBI, U-Boot, a kernel and a root filesystem separately, and who can afford the hardware and the tooling.
- Can I use it commercially?
- Check first. The repository uses a licence we do not classify automatically, so read its LICENSE file before any commercial use.
- Is it still maintained?
- Yes. The repository last received commits 3 days ago.
- What is it written in?
- Mainly Tcl, according to GitHub's language statistics.
Answers come from the project's GitHub data, last synced on November 7, 2026, and from our analysis. They are not legal advice.
Star history
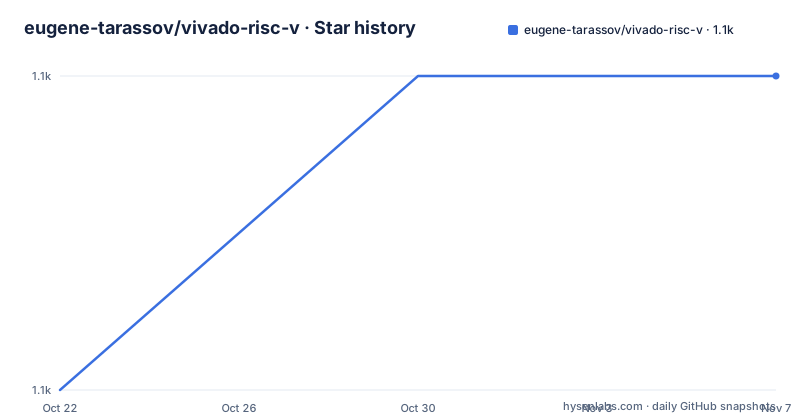
- eugene-tarassov/vivado-risc-v1,103 ★ · +1
| Repository | 2026-10-22 | 2026-11-07 |
|---|---|---|
| eugene-tarassov/vivado-risc-v | 1.1k | 1.1k |
1 Stars in the last 16 days, measured from the daily GitHub snapshot. Compare with other projects
Editorial analysis
A Linux server, not a processor test
The vivado-risc-v repository is a set of AMD/Xilinx Vivado block designs for an FPGA RISC-V SoC running a Debian Linux distribution, and the framing in the first paragraph is what makes it more than a CPU proof of concept.
It is an FPGA prototype of a fully functional RISC-V Linux server, with networking, an online Linux package repository and daily package updates. It includes the scripts and sources to generate the RISC-V SoC hardware description, the Vivado project, the FPGA bitstream and a bootable SD card.
What is on that SD card is the whole boot chain: OpenSBI as the supervisor, U-Boot as the bootloader, the Linux kernel from the stable tree, and a Debian root filesystem. The package repository and its regular updates come from Debian itself, and over 90 percent of the packages of the whole Debian collection are available for download, which is the number that decides whether the thing is a server or a curiosity.
The same hardware can also run bare-metal or RTOS software, with a `bare-metal/` directory in the repository for that path, and the project is used as a reference design to validate RISC-V support in Eclipse TCF. The last point in the README is a small one with a large consequence: AMD and Xilinx tools support debugging of RISC-V software over JTAG, so this is a debuggable system rather than a black box.
The primary language is Tcl, because the hardware is generated by a Vivado flow, and the repository is not archived, with the last push on 2026-07-13 and release v3.9.0 published the same day.
Six boards, and what each one can carry
The supported hardware list is short and the differences between the boards are the differences between the configurations you can build.
The AMD VC707 is the most capable, and it allows prototyping a more powerful system: up to 8 64-bit RISC-V cores, up to a 100MHz clock speed and 1GB of RAM. The KC705 and the Digilent Genesys 2 are as fast as the VC707 but have a slightly smaller FPGA, so they carry up to 4 cores.
The Digilent Nexys Video is several times less expensive, with an academic discount available, and supports up to 2 cores at up to 50MHz. The Nexys A7 100T and the Arty A7 100T are the least expensive supported boards, and the README is blunt about them: they have a small and slow FPGA, barely enough to run Linux on a single core RISC-V at 50MHz.
That last sentence is the design brief for the cheap path. A configuration that fits Linux on one core at 50MHz is not a workstation replacement, it is a machine that boots, runs a shell and serves packages over a network at a speed that would embarrass a 1990s server. It is a very good test platform, and a poor one for anything with a deadline.
The toolchain side has its own split. The Nexys Video, the Nexys A7 100T and the Arty A7 100T are supported by the free version of Vivado, while the KC705, the VC707 and the Genesys 2 require a Vivado licence. For a Digilent board you also install the Vivado board files for Digilent boards.
The workstation requirement is similarly specific: Ubuntu 20.04 or 24.04 LTS with at least 32GB of RAM and sudo access, and other versions or distributions of Linux are not supported in the repository. A Windows 11 machine running Ubuntu on Windows is the documented alternative for running the tools.
Checkout, dependencies, submodules
The build starts with three commands and a make target.
sudo apt install git make
git clone https://github.com/eugene-tarassov/vivado-risc-v.git
cd vivado-risc-v
make apt-install
make update-submodules
`make apt-install` is the step that installs the real toolchain, and the Makefile shows what it pulls in: the device tree compiler, curl, gawk, OpenJDK 17, `libmpc-dev`, `libssl-dev`, gcc, the `gcc-riscv64-linux-gnu` cross compiler, flex, bison, bc, parted, udev and dosfstools.
The Makefile also handles the two Ubuntu releases that need something extra. On focal the target installs `libtinfo5` and python, on jammy it installs `libtinfo5` and `python-is-python3`, and on anything else it installs `libncurses-dev` and `python-is-python3` and then fetches `libtinfo5` directly from the Ubuntu security pool, because that library is required by Vivado but is not available by default on Ubuntu 23.04 and later. That is a small, specific piece of workarounding that tells you the supported range is not theoretical.
`make update-submodules` pulls the component sources, and the repository layout shows what they are: `rocket-chip` for the processor generators, `opensbi`, `u-boot`, `linux-stable` and the `patches/` directory, plus `board/` for the per-board configuration, `project/` and `src/` for the Vivado project and the Scala sources, `generators/`, `bootrom/`, `ethernet/`, `uart/`, `sdc/` for the constraints, `vhdl-wrapper/`, `docker/`, `qemu/`, `docs/` and the `build.sbt` and `sbt-launch.jar` that drive the Scala build.
There is also a Docker route. The Makefile has `docker-image` and `docker-shell` targets that build a `vivado-risc-v-tools` image with a `DOCKER_VIVADO_VERSION` argument, defaulting to 2025.2, and run it with the repository mounted, which is the answer for a workstation that is not the supported Ubuntu version.
Building the bitstream, and the core configurations
The bitstream build is a make target with two variables, and the Vivado environment has to be sourced first.
source /opt/Xilinx/2026.1/Vivado/settings64.sh
make CONFIG=rocket64b2 BOARD=nexys-video bitstream
`BOARD` selects the board and `CONFIG` selects the processor configuration. The board values are `nexys-video`, `kc705`, `vc707`, `genesys2`, `nexys-a7-100t` and `arty-a7-100t`, and the Makefile defaults are `nexys-video` for the board and `rocket64b2` for the configuration.
The configuration list comes from the Scala sources in `src/main/scala/rocket.scala`, and it splits into three groups. The 64-bit big RISC-V cores are Linux capable: `rocket64b1` for one core, `rocket64b2` for two, `rocket64b2l2` for two with a 512KB level 2 cache, `rocket64b2gem` for two with that cache and the Gemmini accelerator, `rocket64b4l2w` for four cores with a 512KB level 2 cache and a wide 256-bit memory bus, `rocket64b4` for four and `rocket64b8` for eight.
The 64-bit Sonic BOOM cores are also Linux capable and are named by width: `rocket64w1` is a 1-wide Small BOOM with one core, `rocket64x1` a 2-wide superscalar Medium BOOM with one core, `rocket64y1` a 3-wide superscalar Large BOOM and `rocket64z1` a 4-wide superscalar Mega BOOM, each with one core.
The 32-bit small RISC-V cores are the cheap ones, `rocket32s1` through `rocket32s16` in one, two, four, eight and sixteen core variants, and they are marked as not supporting Linux.
The FPGA cost of each is given in LUTs, and it is the number to plan a board around. A 32-bit small RISC-V design costs 10,800 LUTs plus 6,100 per core, a 64-bit big RISC-V design 10,800 plus 27,500 per core, a 2-wide superscalar Medium BOOM with one core and an L2 cache takes 148,500 LUTs, and a 3-wide superscalar Large BOOM with one core and an L2 cache takes 252,700. That last figure is why a cheap board holds a single small core and nothing more.
SD card, QEMU and programming the flash
Once there is a bitstream, the Linux side needs an SD card, and there is a script for it.
./mk-sd-cardThe script looks for a USB memory device and asks for confirmation before using it, and the README is emphatic about the consequence: make sure you confirm the right SD card device, because all old data will be erased.
There is a faster route to a working environment, and the README recommends it when Linux runs slowly on the FPGA, especially with lower clock speeds or no ethernet access. The QEMU script checks for the existence of a Debian image under `debian-riscv64/` and runs `./mk-sd-image` as needed, then clones and makes a suitable version of u-boot and opensbi for QEMU before finally booting Linux.
./qemu/boot_qemu.shOnce Linux has booted under QEMU, the same environment is reachable over the network, which is how the dependencies get installed quickly before the design is put on the FPGA:
ssh -p2222 debian@localhostAnd with the image already made, the SD card can be written without rebuilding the image, using `./mk-sd-card skip_mk_img`.
Programming the FPGA flash memory is a make target as well, with the GUI as an alternative documented in `docs/vivado-flash.md`:
source /opt/Xilinx/2026.1/Vivado/settings64.sh
make CONFIG=rocket64b2 BOARD=nexys-video flash
The login details are fixed and stated in the README: the host name is `debian`, the user is `debian` with the password `debian`, and root is `root` with the password `root`. The console is reachable over UART with `sudo miniterm /dev/ttyUSB0 115200`, or over SSH once Linux is up.
Adding a peripheral means three files have to agree
The last part of the README is a tutorial on extending the design, and the reason it is interesting is that adding a device is not one edit.
The flow starts by opening the Vivado project, which is done from the same make-driven environment:
source /opt/Xilinx/2026.1/Vivado/settings64.sh
make CONFIG=rocket64b2 BOARD=nexys-video vivado-gui
The IO block in the design is the best place to add device controllers, GPIO being the example, and the AXI Uartlite is given as a worked example of connecting an IP to the AXI interconnect and to the interrupts.
Then comes the instruction that explains the whole workflow: validate and synthesize the design, but do not build the bitstream yet, because the device tree and the RISC-V HDL need to be updated first. A peripheral in this system is three things that have to match, the block design with the IP wired to the interconnect and the interrupt lines, the device tree so that the kernel knows the device exists and where it is mapped, and the RISC-V HDL side that drives it. Building the bitstream first produces a board that boots with a device the kernel cannot see.
That constraint is the real cost of using an FPGA SoC rather than a board with peripherals on it, and it is also the reason the project keeps a `device-tree-compiler` in its dependency list, since the device tree is generated rather than hand written.
Where this design is the wrong tool
The limits are visible in the requirements, and they are about money and time rather than about the design.
The hardware is the first filter. A supported board costs real money, and the three most capable ones need a paid Vivado licence, which is a procurement conversation rather than a technical one. The cheap boards, the Arty A7 and the Nexys A7, are documented as barely able to run Linux on one core at 50MHz, so the cheap path is a bring-up platform, not a deployment.
The workstation is the second filter. 32GB of RAM on a supported Ubuntu release, with sudo access, is a requirement the Makefile makes concrete, and the repository states that other Linux distributions are not supported, so a team on Fedora is reading the Ubuntu on Windows document and living with it.
The third is the scope of the software. The 32-bit configurations do not run Linux at all, the 64-bit small cores run it but slowly, and the wide BOOM configurations that would be interesting to benchmark cost 148,500 and 252,700 LUTs, which is more than the cheap boards have. In other words, the design points at the interesting processor configurations and away from the boards a student can afford, and the two rarely meet.
The alternative for most purposes is not another FPGA design but the QEMU path already in the repository, or a virtual machine with a RISC-V user-mode environment, where a kernel boots in seconds and a package install takes a minute. The difference in approach is that a simulator gives you software and a board gives you hardware, with the FPGA, the JTAG debug, the FPGA utilization budget and the real boot chain as what you pay for the privilege. If the goal is a test and debug environment for RISC-V software, the simulator wins on every axis. If the goal is a machine that exists in the physical world and runs the real firmware, this repository is one of the more complete ways to get there.
The last administrative point is the licence. GitHub does not classify the repository under a standard licence, and the tree contains upstream projects with their own terms, so `LICENSE.md` has to be read rather than assumed.
Editorial conclusion
vivado-risc-v fits a hardware engineer who needs a real RISC-V Linux system with networking and package access on an FPGA, who wants the whole stack in one repository rather than assembling OpenSBI, U-Boot, a kernel and a root filesystem separately, and who can afford the hardware and the tooling. It is the wrong choice for a software team that only needs a RISC-V target to compile and run against, because the QEMU path in the repository is a stepping stone to the FPGA rather than a substitute for a virtual machine, and it is the wrong choice for a board outside the supported list. Before starting, check that your board is one of the six supported ones and whether it needs a paid Vivado licence, budget a 32 GB workstation on Ubuntu 20.04 or 24.04, and read the `LICENSE.md` file, since GitHub cannot classify the repository under a standard licence.
Frequently asked questions
Which FPGA boards are supported by vivado-risc-v?
The AMD VC707 and KC705, the Digilent Genesys 2, Nexys Video, Nexys A7 100T and Arty A7 100T. The VC707 allows up to 8 64-bit cores at up to 100MHz with 1GB RAM, the KC705 and Genesys 2 up to 4 cores, the Nexys Video up to 2 cores at 50MHz, and the Arty A7 and Nexys A7 are described as barely enough for Linux on a single core at 50MHz.
How do I build the FPGA bitstream for the RISC-V SoC?
Source the Vivado settings script, then run `make CONFIG=rocket64b2 BOARD=nexys-video bitstream`. The BOARD variable selects the board, with values kc705, vc707, genesys2, nexys-a7-100t and arty-a7-100t, and the CONFIG variable selects the processor configuration, from a single 64-bit core up to eight cores or a BOOM core.
Can I try the design in QEMU before using the FPGA?
Yes. The script ./qemu/boot_qemu.sh checks for a Debian image under debian-riscv64/, runs the mk-sd-image step as needed, then clones and makes u-boot and opensbi for QEMU before booting Linux. You can then reach it with `ssh -p2222 debian@localhost` and write the SD card with ./mk-sd-card skip_mk_img.
What is on the SD card and how do I log in?
The card carries OpenSBI, U-Boot, the Linux kernel and a Debian root filesystem, with over 90 percent of the Debian package collection available for download. The host name is debian, the user login is debian with the password debian, root is root with the password root, and the console is reachable with `sudo miniterm /dev/ttyUSB0 115200`.
Official sources
Add this badge to your README
If you maintain this project, the badge below links readers to this analysis and shows its maintenance status from the daily GitHub snapshot. Paste the markdown into your README; add ?metric=license or ?metric=stars to the image URL for a different field.

[](https://hysenlabs.com/projects/eugene-tarassov-vivado-risc-v)Star history chart for your README
[](https://hysenlabs.com/projects/eugene-tarassov-vivado-risc-v)Was this useful?