lexima.vim closes brackets by rule, and repeats the rule with the dot
Auto close parentheses and repeat by dot dot dot...
At a glance
- What is it?
- Lexima is a Vim plugin that automatically inserts closing characters, expands newlines into matched pairs, and can teach the dot key to replay the same expansion. Everything is driven by a rule table you can extend per filetype, and it runs on Vim 8.1 or Neovim 0.4.3 and later.
- Who is it for?
- Adopt lexima.vim if you want bracket closing and newline expansion to be data driven rather than hardcoded in a handful of mappings, because the rule table and the per filetype filter make it easy to say exactly where an automatic insertion should and should not happen.
- Can I use it commercially?
- Not without permission. GitHub finds no licence file in the repository, and without a licence all rights are reserved by default: you may read the code but not reuse it. Check the README, or ask the authors, before using it.
- Is it still maintained?
- Yes. The repository last received commits 120 days ago.
- What is it written in?
- Mainly Vim Script, according to GitHub's language statistics.
Answers come from the project's GitHub data, last synced on November 7, 2026, and from our analysis. They are not legal advice.
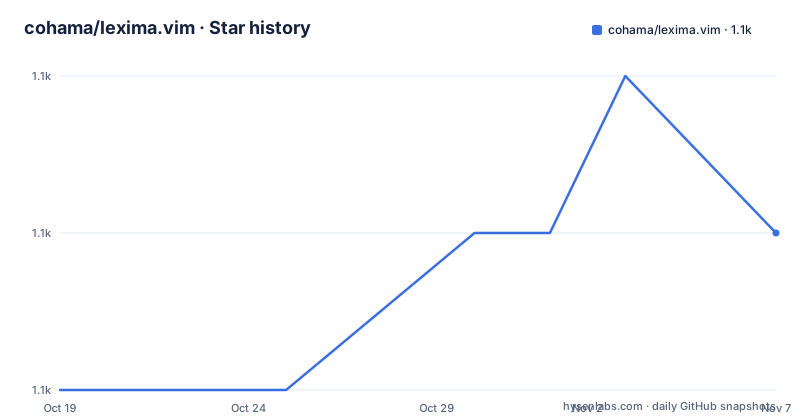
Star history
- cohama/lexima.vim1,126 ★ · +1
| Repository | 2026-10-19 | 2026-11-07 |
|---|---|---|
| cohama/lexima.vim | 1.1k | 1.1k |
1 Stars in the last 19 days, measured from the daily GitHub snapshot. Compare with other projects
Editorial analysis
Rules decide when a closing character appears
Most auto-pair plugins hardcode a table of opening characters and insert the matching closer. Lexima inverts that. The core idea is a rule set where each entry says what context you are in, what you typed, and what should be inserted, and the plugin evaluates your position against those patterns before it does anything. The README describes it as automatically closing pairs such as parentheses, braces and quotation marks, but stresses that in advance you can customize the rule to automatically input any character in any context. The distinction is real and it is the whole design: the default behaviour of a closing quote inside a string versus a closing quote after an escaped character is expressed as separate rules with different position patterns, not as special cases in code. The full default table lives in `g:lexima#default_rules` inside `autoload/lexima.vim`, and the help file is the reference for the pattern syntax.
The default rules split into three switchable groups
Each group of defaults has its own variable, and each is enabled by default. `g:lexima_enable_basic_rules` covers the character level behaviour, with a table of before, input and after states: typing an opening parenthesis gives a matched pair with the cursor inside, typing a double quote on an empty line gives a pair with the cursor before the closing quote, and typing a double quote between two quotes gives three quotes with the cursor in the middle. There is also a rule for the word `I'm`, which shows the plugin is matching word contexts rather than blindly appending, and rules where backspace removes a pair. The newline group, `g:lexima_enable_newline_rules`, expands a carriage return inside braces into a block with the closing brace on its own line, and does the same for triple-backtick fenced blocks, where the fence has to be recognised as a fence rather than as three separate backtick characters. The third group, `g:lexima_enable_endwise_rules`, is the one that knows about language keywords: in the Ruby filetype a carriage return after a `def` line inserts `end`, and the same happens for `module`, `class` and `while`, in the Vim filetype for `function`, `if` and `while`, and in shell for `if` and `case`.
Writing your own rule takes one function call
Customisation is a single call to `lexima#add_rule()`, and the example in the README adds LaTeX dollar sign handling. Three rules together: one inserts a closing `$` after the character, one triggers when the cursor is on a `$`, and one deletes the pair on backspace:
call lexima#add_rule({'char': '$', 'input_after': '$', 'filetype': 'latex'})
call lexima#add_rule({'char': '$', 'at': '\%#\$', 'leave': 1, 'filetype': 'latex'})
call lexima#add_rule({'char': '<BS>', 'at': '\$\%#\$', 'delete': 1, 'filetype': 'latex'})
The keys are readable once you know them. `char` is the character you type, `at` is a Vim pattern that has to match at the cursor, `filetype` scopes the rule to one filetype, `input` and `input_after` say what gets inserted and where, and `leave` and `delete` control whether the cursor stays put or something is removed. Because the rules carry a filetype, the same plugin can behave completely differently in LaTeX and in Python without any conditional logic in your configuration. The README also shows a rule that deliberately does not fire before a word, which is the pattern to reach for when you want the default behaviour narrowed rather than replaced.
The dot key replays the expansion
The feature that distinguishes Lexima from a plain auto-pair plugin is dot repeatability, and the README demonstrates it in two steps. Typing a call with an unclosed argument produces a closing pair, so the line ends up balanced. Then typing `0.` replays the whole thing, so the second copy is complete and balanced as well rather than a pile of unmatched closers. This is a different contract from the one most editors implement, where the dot repeats the insertion of a single closing character. Here the dot replays the sequence of actions the rule performed, which means a repeated line is syntactically valid. That is what makes the plugin usable in the middle of real editing, where you duplicate a call and fix up its arguments, and it is the reason the project description leads with repeating by dot.
The plugin is a plain Vim plugin with a test suite
The repository layout is the standard Vim plugin arrangement: an `autoload/` directory holding the rule definitions and the functions, a `plugin/` directory for the entry point, a `doc/` directory for the help file, and a `test/` directory. There is a `Makefile` with two targets, and the test target clones the themis framework and runs it against the test directory:
test/vim-themis/bin/themis --reporter dot testThe Makefile obtains that binary with a clone of the thinca vim-themis repository into `test/vim-themis`. The repository also has a `.themisrc` file, which is where the test configuration lives, and a GitHub Actions workflow for the test badge that appears at the top of the README. The project is written in Vim Script, requires Vim 8.1 or Neovim 0.4.3 or newer, and is installed the way any Vim plugin is, by dropping the repository into your plugin directory. The README does not document a package manager install or a configuration snippet for the plugin manager, so that step is on you.
Where the rules can surprise you
Two limits are worth thinking about before you commit to it. The first is that the position patterns are Vim regular expressions, so a rule that looks simple in the documentation is really a pattern you will have to test, and the failure mode when a pattern is wrong is that nothing happens rather than an error message. The second is that the keyword aware endwise rules are per filetype, so a language whose block syntax differs from the Ruby, Vim and shell cases listed will not get the treatment, and you would have to write those rules yourself. The plugin also does not say anywhere what happens when a rule set conflicts, for instance when a custom rule overlaps a default one, so a configuration that behaves unexpectedly is something you resolve by reading the rule table rather than by consulting documentation on precedence. The help file at `:help lexima-customization` is the reference for all of this.
Editorial conclusion
Adopt lexima.vim if you want bracket closing and newline expansion to be data driven rather than hardcoded in a handful of mappings, because the rule table and the per filetype filter make it easy to say exactly where an automatic insertion should and should not happen. Do not adopt it if you rely on a single global auto-pair mapping, since the plugin's behaviour is defined by the interaction of context patterns, and the pattern language is the part you will have to learn from the help file. Verify first that your editor is Vim 8.1 or Neovim 0.4.3 or newer, that the three rule groups are enabled as you expect, and that the dot repeat works for the rules you care about before you turn off your existing auto-pair setup.
Frequently asked questions
What are the requirements for lexima.vim?
The README lists Vim 8.1 or newer, or Neovim 0.4.3 or newer. The plugin is written in Vim Script and is installed as a normal Vim plugin.
How do I add a custom rule in lexima.vim?
Call `lexima#add_rule()` in your vimrc with a dictionary describing the character, the position pattern and the filetype. The README's LaTeX example uses three calls, with the keys `char`, `at`, `input`, `input_after`, `leave`, `delete` and `filetype`.
How does the dot repeat work in lexima.vim?
Typing a call with an unclosed argument produces a balanced line, and then typing `0.` replays the whole expansion so the repeated copy is balanced as well. The dot replays the sequence of actions the rule performed rather than a single inserted character.
Which filetype does lexima.vim use for endwise rules?
The README shows endwise rules for Ruby, where a carriage return after a `def` line or a `do` block inserts `end`, and it says the same applies to `module`, `class` and `while`. Rules for `function`, `if` and `while` exist in the vim filetype, and `if` and `case` in sh.
How do I run the lexima.vim tests?
The Makefile has a test target that runs `test/vim-themis/bin/themis --reporter dot test`, after cloning the thinca vim-themis framework into `test/vim-themis`. The repository also carries a `.themisrc` file and a GitHub Actions workflow for the test badge.
Official sources
Add this badge to your README
If you maintain this project, the badge below links readers to this analysis and shows its maintenance status from the daily GitHub snapshot. Paste the markdown into your README; add ?metric=license or ?metric=stars to the image URL for a different field.

[](https://hysenlabs.com/projects/cohama-lexima-vim)Star history chart for your README
[](https://hysenlabs.com/projects/cohama-lexima-vim)Was this useful?