expo-server-sdk: sending Expo push notifications in batches and reading receipts
Server-side library for working with the Expo push notification service using Node.js
At a glance
- What is it?
- expo-server-sdk is Expo's official Node library for the Expo push notification service. It validates push tokens, splits messages into batches so you are not making one request per notification, and gives you the two-step ticket and receipt flow you need to see which deliveries actually reached a device.
- Who is it for?
- Adopt expo-server-sdk if you send push notifications from a Node backend to Expo clients and want the batching, token validation and receipt handling that the service requires, without hand-rolling the request format. Do not adopt it if you need real time delivery confirmation, because the receipt step is a separate, later call, and do not skip the receipt handling, since Apple and Google report blocked and uninstalled devices through it.
- Can I use it commercially?
- Yes. MIT is a permissive licence: you can use, modify and sell software built on it, as long as you keep its copyright and licence notices.
- Is it still maintained?
- Yes. The repository last received commits 6 days ago.
- What is it written in?
- Mainly TypeScript, according to GitHub's language statistics.
Answers come from the project's GitHub data, last synced on November 7, 2026, and from our analysis. They are not legal advice.
Star history
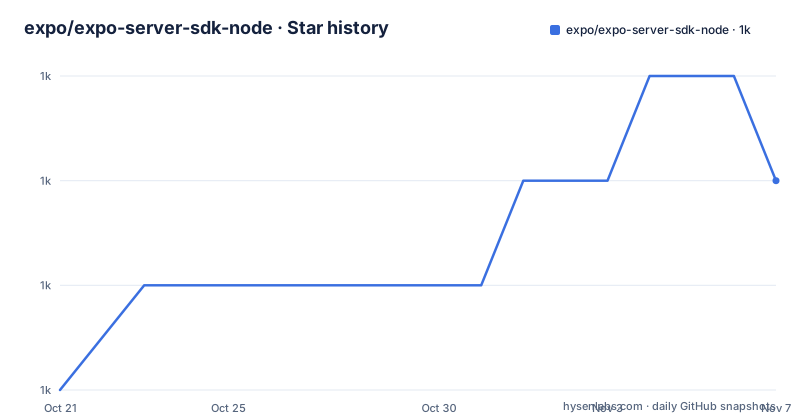
- expo/expo-server-sdk-node1,038 ★ · +2
| Repository | 2026-10-21 | 2026-11-07 |
|---|---|---|
| expo/expo-server-sdk-node | 1k | 1k |
2 Stars in the last 17 days, measured from the daily GitHub snapshot. Compare with other projects
Editorial analysis
Expo's own client for its push service
expo-server-sdk is the server-side library for working with the Expo push notification service using Node.js, written in TypeScript and published to npm as expo-server-sdk. The licence is MIT.
The package is small on purpose. The dependencies are promise-limit, promise-retry and undici, and that list tells you most of the design. undici is the HTTP client, promise-retry handles the retry behaviour, and promise-limit is there to cap how many requests are in flight at once, which is how the library keeps a large send from opening hundreds of sockets at the service.
The package manifest is worth a look for the constraints it states. The name is expo-server-sdk, the version at the time of writing is 7.2.0, the package is an ES module with type set to module, the entry point and the single export are ./build/ExpoClient.js, and the types come from ./build/ExpoClient.d.ts. The engines field requires Node 22.12.0 or newer, which is the sort of floor that changes with a major version, and the package manager is pinned to yarn 4.12.0.
Installation is the usual one:
yarn add expo-server-sdkOne practical note about where bugs go. The README says that if you have problems with the code in this repository, file issues and bug reports at the expo/expo repository. The SDK is developed inside the main Expo monorepo's orbit, so the issue tracker for this specific repository is not where a user is expected to report problems.
Validate tokens, then batch the messages
The sending example is the clearest statement of the intended usage pattern, and it is short.
// Create a new Expo SDK client
// optionally provide an access token if you have enabled push security
const expo = new Expo({
  accessToken: process.env.EXPO_ACCESS_TOKEN,
});

const targetPushTokens: string[] = [];

// Create the messages that you want to send to clients
const messages = targetPushTokens.map((pushToken) => {
  // Each push token looks like "ExponentPushToken[xxxxxxxxxxxxxxxxxxxxxx]"
  // Check that all push tokens have valid Expo push token format
  if (!Expo.isExpoPushToken(pushToken)) {
    throw new Error(`Push token ${pushToken} is not a valid Expo push token`);
  }
  return {
    to: pushToken,
    body: 'This is a test notification',
    badge: 2,
    data: { withSome: 'data' },
    richContent: {
      image: 'https://example.com/statics/some-image-here-if-you-want.jpg'
    },
  };
});
Two decisions in that snippet are worth copying. The first is that tokens are validated with Expo.isExpoPushToken before anything is sent, and an invalid one throws rather than being sent and failing at the service. A token in the wrong format is a bug in your registration flow, and finding it at send time means finding it during development, not in production.
The second is the batching. The comment explains it directly: the Expo push notification service accepts batches of notifications so that you do not need to send 1000 requests to send 1000 notifications, and the library recommends batching to reduce the number of requests and to compress them, since notifications with similar content get compressed. The helper is expo.chunkPushNotifications(messages), which returns the chunks for you.
The client can be constructed with an access token, which the comment ties to push security being enabled, and the example reads it from an environment variable rather than a constant.
Batches are sent one at a time to spread the load
After the chunking, the sending loop is a simple for-of over the chunks, with one deliberate choice in it.
const chunks = expo.chunkPushNotifications(messages);
let tickets = [];
for (const chunk of chunks) {
  try {
    const ticketChunk = await expo.sendPushNotificationsAsync(chunk);
    console.log('result of sending push messages to Expo:', ticketChunk);
    tickets.push(...ticketChunk);
  } catch (error) {
    console.error(error);
  }
}
The comment describes the strategy as a simple one, sending one chunk at a time, which nicely spreads the load out over time. That is the pattern the documentation recommends, and it is worth understanding why it matters. If you fire every chunk in parallel you get a burst of requests from a single backend, which is the traffic pattern the service handles worst and which makes a rate limit response more likely. One chunk at a time trades total latency for a request pattern the service is happy with, and for a backlog send that is the right trade.
The other point is the ticket. Each call returns a ticket per message, and the tickets are collected into one array. The comment also flags the failure case that is easy to lose: if a ticket contains an error code in ticket.details.error you must handle it appropriately, with the individual error codes listed in the Expo documentation.
Not every ticket has an id, and the later example says so explicitly. Tickets for notifications that could not be enqueued will have error information and no receipt id, which is a direct hint that you should not assume a receipt exists for everything you sent.
Tickets, receipts, and the error codes you must act on
The delivery model is two steps, and understanding it is what makes the library usable in production.
Sending a notification produces a ticket, and the ticket contains a receipt id that you later use to get the receipt. After the service has delivered the notifications to Apple or Google, which is usually quickly but can take up to 30 minutes when under load, a receipt is created for each notification. The receipts will be available for at least a day, and stale receipts are deleted.
That last sentence is a hard operational constraint. Receipts are not a log you can keep forever, so if you want a record of what was delivered you have to persist the receipts yourself within that window.
The receipts may contain error codes that you must respond to, and the reason is important. Apple or Google may block apps that continue to send notifications to devices that have blocked notifications or have uninstalled the app. Expo does not control that policy, and it sends back the feedback from Apple and Google so you can handle it appropriately. In practice that means the receipt is where you discover that a device is gone, and the correct response is to stop sending to that token, not to log it and carry on.
The receipt retrieval is chunked in the same way as sending, since the service takes batches of receipt ids too, and the second example collects the ids first:
const receiptIds = tickets.filter((ticket) => ticket.status === 'ok').map((ticket) => ticket.id);
const receiptIdChunks = expo.chunkPushNotificationReceiptIds(receiptIds);
for (let chunk of receiptIdChunks) {
  const receipts = await expo.getPushNotificationReceiptsAsync(chunk);
  const failedReceipts = Object.values(receipts).filter((receipt) => receipt.status !== 'ok');
}
Filtering on ticket.status === 'ok' before mapping to ids is the same point made in code: only the tickets that were actually accepted have a receipt to fetch.
The build, the tests and the CI pipeline
The development setup is modern and, unusually, it is driven by mise rather than by a pile of npm scripts.
The mise.toml file lets you run the full CI pipeline with mise, using the command mise run ci, and each task in the pipeline can also be run separately. The commands mise install and mise en. will also install tools for your current interactive shell, including yarn, which is the ergonomic touch, since it means your shell and the CI use the same tool versions without you managing a version file by hand.
The package scripts are the fallback path. They can be run with either yarn <name> or node --run <name>, and the set is small: build runs yarn prepack, which is tsc --project tsconfig.build.json, lint runs eslint, tsc runs tsc, watch runs tsc --watch, and test runs node --test --env-file.env.
That test command is the part to notice. The test suite uses the Node built-in test runner, node --test, rather than Jest or Vitest, and it loads the.env file, which is how the tests get the credentials they need to talk to the live service. There is a.env file in the repository root, which is a small thing that tells you a lot about how this package is tested: the tests are integration tests against the real Expo service.
The source lives in src/ and the build output is emitted to build/, with tsconfig.json and tsconfig.build.json separating the development and packaging configurations. The linting uses eslint-config-universe, with a local eslint.config.ts, and formatting is Prettier via.prettierrc. Dependabot-style updates are handled by renovate.json, and the changes are recorded in CHANGELOG.md.
Maintenance, other language SDKs, and where to send bugs
The release cadence in the 7.x line is quick. v7.0.0 was tagged on 2026-07-30, v7.1.0 on 2026-08-08 and v7.2.0 on 2026-08-24, and the last push was on 2026-09-29. Releases in the 7.x line came within weeks of each other, so it is worth reading the changelog when you bump.
The See Also section lists the equivalents in other languages, and this is where the real alternative sits. There is expo-server-sdk-ruby, expo-server-sdk-python and expo-push-notification-client-rust, in the expo-community organisation for the first two. The difference in approach is straightforward: this library wraps the push service in Node with the batching, retry and receipt helpers already implemented, whereas the other clients are separate implementations of the same service for stacks that are not Node. If your backend is Ruby or Python, the community SDK is a closer fit than a Node service calling out to it.
The remaining caveat is about where a problem gets reported. The README directs issues and bug reports to the expo/expo repository rather than to this one, and the package manifest lists this repository's own issue tracker. That is a sign of how the project is organised, and it is worth knowing before you spend an hour writing a good bug report in the wrong tracker.
One more small thing from the manifest: the author contact is [email protected], which is the route for a support question rather than a code bug.
Editorial conclusion
Adopt expo-server-sdk if you send push notifications from a Node backend to Expo clients and want the batching, token validation and receipt handling that the service requires, without hand-rolling the request format. Do not adopt it if you need real time delivery confirmation, because the receipt step is a separate, later call, and do not skip the receipt handling, since Apple and Google report blocked and uninstalled devices through it. Before you start, check that your Node runtime is 22.12.0 or newer, keep the access token in an environment variable if you have enabled push security, and treat every non-ok receipt as something to act on rather than something to log.
Frequently asked questions
How do I send Expo push notifications from a Node server?
Install the package with yarn add expo-server-sdk, create a client with new Expo, validate each token with Expo.isExpoPushToken, build the message objects, split them with expo.chunkPushNotifications and send the chunks one at a time with expo.sendPushNotificationsAsync. Sending one chunk at a time spreads the load over time.
What is the difference between an Expo push ticket and a receipt?
Sending a notification produces a ticket, and the ticket contains a receipt id that you later use to get the receipt. The receipt is created after the service has delivered to Apple or Google, which is usually quickly but can take up to 30 minutes when under load, and receipts are available for at least a day before stale ones are deleted.
What should I do with failed Expo push receipts?
You must handle the error codes, because Apple or Google may block apps that keep sending to devices that blocked notifications or uninstalled the app, and Expo passes that feedback back. The typical action is to stop sending to that token rather than only logging the error.
What Node.js version does expo-server-sdk require?
Node 22.12.0 or newer, according to the engines field in the package manifest. The package is an ES module, its export is build/ExpoClient.js and the types ship as build/ExpoClient.d.ts.
Are there Expo push notification SDKs for other languages?
Yes, the README points to expo-server-sdk-ruby, expo-server-sdk-python and expo-push-notification-client-rust. If your backend is not Node, one of those is a closer fit than this library.
Official sources
Add this badge to your README
If you maintain this project, the badge below links readers to this analysis and shows its maintenance status from the daily GitHub snapshot. Paste the markdown into your README; add ?metric=license or ?metric=stars to the image URL for a different field.

[](https://hysenlabs.com/projects/expo-expo-server-sdk-node)Star history chart for your README
[](https://hysenlabs.com/projects/expo-expo-server-sdk-node)Was this useful?