Magic123 combines a 2D diffusion prior with Zero123, and pays for it in compile steps
[ICLR'24] Official PyTorch Implementation of Magic123: One Image to High-Quality 3D Object Generation Using Both 2D and 3D Diffusion Priors
At a glance
- What is it?
- Magic123 is the Apache-2.0 PyTorch implementation of an ICLR 2024 paper that generates a 3D object from one image using both a 2D diffusion prior and the Zero123 3D prior. Running it means compiling CUDA extensions against your exact GPU architecture, and the pip install alone does not do that.
- Who is it for?
- Use Magic123 if you want to reproduce or extend the specific result in the ICLR 2024 paper, since the code is a research implementation built on Stable-DreamFusion and expects a single NVIDIA GPU with a locally compiled extension set. Do not use it as a general image-to-3D service or library: transformers is pinned below version 5 and several dependencies are pinned exactly, so it will not slot into a current product stack without work.
- Can I use it commercially?
- Yes. Apache-2.0 is a permissive licence: you can use, modify and sell software built on it, as long as you keep its copyright and licence notices.
- Is it still maintained?
- Yes. The repository last received commits 125 days ago.
- What is it written in?
- Mainly Jupyter Notebook, according to GitHub's language statistics.
Answers come from the project's GitHub data, last synced on November 6, 2026, and from our analysis. They are not legal advice.
Star history
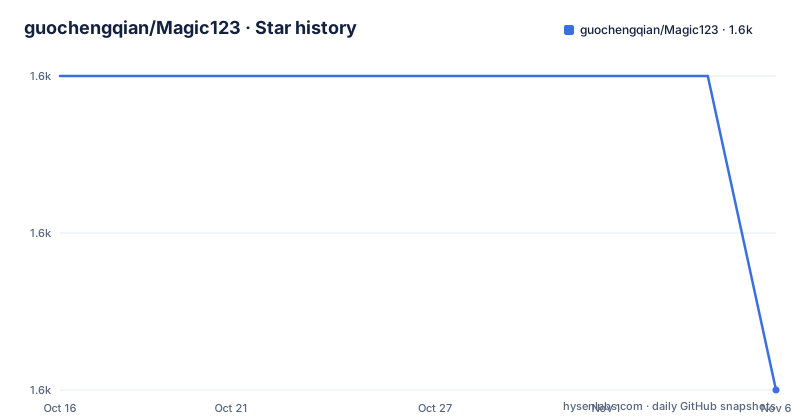
- guochengqian/Magic1231,621 ★ · -2
| Repository | 2026-10-16 | 2026-11-06 |
|---|---|---|
| guochengqian/Magic123 | 1.6k | 1.6k |
-2 Stars in the last 21 days, measured from the daily GitHub snapshot. Compare with other projects
Editorial analysis
Two priors, and a knob between them
Magic123 generates a high quality 3D object from a single image by using both a 2D diffusion prior and a 3D diffusion prior. The 3D side comes from Zero-1-to-3, and the 2D side is Stable Diffusion, with the code built on the Stable-DreamFusion repository rather than written from scratch.
The README includes a comparison of Magic123 against ablations using only the 2D prior, described as SDS, or only the 3D prior, described as Zero123, along with a variant without textual inversion. That ablation is the argument for the whole design: neither half alone gives the result, so the contribution is the combination and how the two are balanced.
The balance is exposed rather than fixed. The README describes the effect of the joint prior directly: increasing the strength of the 2D prior leads to more imagination, more details, and less 3D consistency. That is a trade rather than a dial where more is better. Push toward 2D and the model invents detail the input image does not contain; pull back and the result stays closer to the source but flatter. If you are evaluating this for asset generation, that knob and the side of it you pick will matter more than any single benchmark.
The paper is on arXiv at 2306.17843 and the work was accepted to ICLR24, announced 2024/01/16.
The pip install is not the install
The package is on PyPI as `magic123`, but the README is emphatic about what that does not do. The PyPI package ships the Python project and the source code for the CUDA extensions, and those extensions must be compiled locally because PyTorch CUDA extension wheels have to match the local Python, PyTorch, CUDA toolkit, compiler and GPU architecture.
The sequence the README gives is this:
python -m venv venv_magic123
source venv_magic123/bin/activate
python -m pip install --upgrade pip setuptools wheel
python -m pip install magic123

export CUDA_HOME=${CUDA_HOME:-/usr/local/cuda-12.9}
export PATH=$CUDA_HOME/bin:$PATH
git clone https://github.com/guochengqian/Magic123.git
cd Magic123
bash scripts/install_ext.sh
Note that the git clone happens after the pip install. The wheel gets you the Python layer, the repository gets you the extension sources, and `scripts/install_ext.sh` compiles them. The script auto-detects the GPU compute capability, with the README giving RTX 5090 as an example of 12.0 and RTX 4090 as an example of 8.9, with `TORCH_CUDA_ARCH_LIST` available as an override.
There is a second path, `source install.sh`, which sets up the environment in one step. The README notes that install.sh uses a Python venv by default and that you can switch it to conda by editing the file.
Toolchain version pins are where installs break
The hardware notes in the README are the most operationally useful part of the document, because each one corresponds to a real failure.
For Blackwell, an RTX 5090 needs a `sm_120` PyTorch build, which the README points at installing with `pip install torch torchvision --index-url https://download.pytorch.org/whl/cu128`, a CUDA 12.8 or newer toolkit, and gcc-14, because CUDA 12.9 rejects gcc-15. The extension build then needs `TORCH_CUDA_ARCH_LIST=12.0`.
The README gives RTX 4090 as an example using compute capability `8.9`. Check NVIDIA's specification for the exact GPU you use.
On the compiler side, CUDA 12.9's nvcc supports GCC up to 14, so a system defaulting to GCC 15 requires building with `gcc-14` and `g++-14`, which you set through `CC` and `CXX`. The toolkit must supply nvcc, checkable with `python scripts/check_cuda_build_env.py`. Python development headers are also required, `python3-dev` on Ubuntu and Debian or a version-specific package such as `python3.10-dev`.
On Windows you need Visual Studio Build Tools with the Desktop development with C++ workload, run from a Developer PowerShell or Developer Command Prompt, and the Visual Studio version must be one the installed CUDA toolkit supports. On Colab, install PyTorch and the matching CUDA toolkit first, then run the same script, rebuilding with `--no-cache-dir` if Colab changes its image.
After installing the dependencies and extensions, the README offers `scripts/magic123/smoke_train_ironman_10_steps.sh` as a short training smoke test. Passing it is useful evidence for that environment, not proof that all configurations or workloads work.
Model weights and checkpoints
The setup guide specifies two checkpoints under `pretrained/`; the Stable Diffusion prior also requires model weights. The Zero123 3D diffusion prior uses `105000.ckpt` by default, with the reimplementation borrowed from the Stable Diffusion repo and available in `guidance/zero123_utils.py`:
cd pretrained/zero123
wget https://huggingface.co/cvlab/zero123-weights/resolve/main/105000.ckpt
cd ../../
MiDaS supplies depth estimation and uses `dpt_beit_large_512.pt`, placed in `pretrained/midas/`:
mkdir -p pretrained/midas
cd pretrained/midas
wget https://github.com/isl-org/MiDaS/releases/download/v3_1/dpt_beit_large_512.pt
cd ../../
One detail here is worth flagging for anyone who followed this repository from its start. The README's Blackwell note points the smoke test at a Stable Diffusion 1.5 mirror described as maintained, `stable-diffusion-v1-5/stable-diffusion-v1-5`, and explains that `runwayml/stable-diffusion-v1-5` was removed from the Hub. Code that hard-codes the old identifier will fail on download, so check what your checkpoint path resolves to.
The system dependencies come first in the README: it says the project is only tested on Ubuntu, with `apt install git wget libeigen3-dev python3-dev python3-venv -y`.
Preprocessing is optional, and textual inversion costs two hours
The README states that all preprocessed files are included in the `./data` directory, and that preprocessing is only necessary if you want to test your own examples. It takes seconds. The first step extracts depth:
python preprocess_image.py --path /path/to/imageThe second step, textual inversion, is the expensive one and the README says so directly. Magic123 uses the default textual inversion from diffusers, which consumes around 2 hours on a 32G V100. The documented alternatives are to study whether there is a faster textual inversion, or not to use it and accept a loss of texture and shape consistency.
That second option is a genuine quality decision rather than a convenience, and the ablation figure in the README includes a run without textual inversion precisely so you can see the gap. If you are reproducing the paper's numbers, you need the inversion step and the GPU time for it. If you are trying the method on your own asset, skipping it and accepting softer texture is a reasonable first run.
Foreground segmentation for preprocessing lives in the `preprocess` extra as `rembg` and `carvekit-colab`, deliberately kept out of the core install because of heavy and old transitive dependencies.
Dependency pins betray the research origin
`pyproject.toml` requires Python 3.10 or later and classifies the project as Development Status :: 4 - Beta, with classifiers for 3.10, 3.11 and 3.12. The dependency list is where the age of the codebase shows.
Three pins do real work. `diffusers>=0.9.0,<1.0` keeps the package on the 0.x line. `transformers>=4.25,<5` carries an inline comment explaining that transformers 5.x removed CLIPFeatureExtractor and other symbols the code relies on. And `timm==0.6.7` is pinned exactly because MiDaS requires it, which the requirements file repeats with a comment saying the same.
`requirements.txt` goes further, listing git dependencies directly: nvdiffrast from NVlabs, CLIP from openai, cubvh, and shap-e, plus `pymeshlab==2022.2.post4` pinned at a specific post release, with a comment crediting a contributor through an issue. These are reproducible-pinning decisions rather than preference, and they also mean a plain `pip install -r requirements.txt` reaches out to GitHub during install.
The license is Apache-2.0, with LICENSE and license-files both declared in the project metadata. Apache-2.0 permits commercial and derivative use with attribution, which is the right fit for research code you intend to build on, provided you track the pinned toolchain when you fork it.
Editorial conclusion
Use Magic123 if you want to reproduce or extend the specific result in the ICLR 2024 paper, since the code is a research implementation built on Stable-DreamFusion and expects a single NVIDIA GPU with a locally compiled extension set. Do not use it as a general image-to-3D service or library: transformers is pinned below version 5 and several dependencies are pinned exactly, so it will not slot into a current product stack without work. Before running anything, run `python scripts/check_cuda_build_env.py` and confirm your compute capability matches what scripts/install_ext.sh detects, since that is where most first attempts fail.
Frequently asked questions
How do I install Magic123?
Create a venv, `python -m pip install magic123`, then clone the repository and run `bash scripts/install_ext.sh` after setting CUDA_HOME. The extension modules compile locally because CUDA extension wheels must match your Python, PyTorch, CUDA toolkit, compiler and GPU architecture.
Does Magic123 support the RTX 5090?
The project documents an RTX 5090 setup with an sm_120-capable PyTorch build, a CUDA 12.8 or newer toolkit and TORCH_CUDA_ARCH_LIST=12.0. Its example uses CUDA 12.9 and GCC 14 because that toolkit rejects GCC 15. Verify the compatible compiler and PyTorch/toolkit combination for the versions you install; the project says its extension script can detect the architecture.
Which pretrained models does Magic123 need?
The setup guide names Zero-1-to-3's 105000.ckpt under pretrained/zero123/ and MiDaS's dpt_beit_large_512.pt under pretrained/midas/. The 2D Stable Diffusion prior also needs model weights, and access or download requirements depend on the model and workflow you choose.
Is textual inversion required to run Magic123?
It is optional but affects quality. The default diffusers textual inversion takes around 2 hours on a 32G V100, and the README says skipping it costs texture and shape consistency.
Official sources
Add this badge to your README
If you maintain this project, the badge below links readers to this analysis and shows its maintenance status from the daily GitHub snapshot. Paste the markdown into your README; add ?metric=license or ?metric=stars to the image URL for a different field.

[](https://hysenlabs.com/projects/guochengqian-magic123)Star history chart for your README
[](https://hysenlabs.com/projects/guochengqian-magic123)Was this useful?