BundleSDF: neural 6-DoF tracking that reconstructs the object as it goes
[CVPR 2023] BundleSDF: Neural 6-DoF Tracking and 3D Reconstruction of Unknown Objects
At a glance
- What is it?
- BundleSDF is the implementation of a CVPR 2023 paper that tracks an unknown rigid object in a monocular RGBD video while reconstructing its geometry and appearance at the same time, so the two processes inform each other instead of running in sequence. It suits robotics and computer vision researchers, with an NVIDIA container, downloadable example data, and a specified format for custom RGB-D input.
- Who is it for?
- Adopt BundleSDF if you are working on 6-DoF pose estimation for objects you have never seen before and you want the reconstruction built jointly with the tracking rather than afterwards, because that coupling is what the paper contributes. Do not adopt it as a general reconstruction toolkit, since the pipeline is shaped around a specific research setup and assumes a segmented first frame.
- Can I use it commercially?
- Check first. The repository uses a licence we do not classify automatically, so read its LICENSE file before any commercial use.
- Is it still maintained?
- Activity is slowing. The repository last received commits 6 months ago.
- What is it written in?
- Mainly Python, according to GitHub's language statistics.
Answers come from the project's GitHub data, last synced on November 7, 2026, and from our analysis. They are not legal advice.
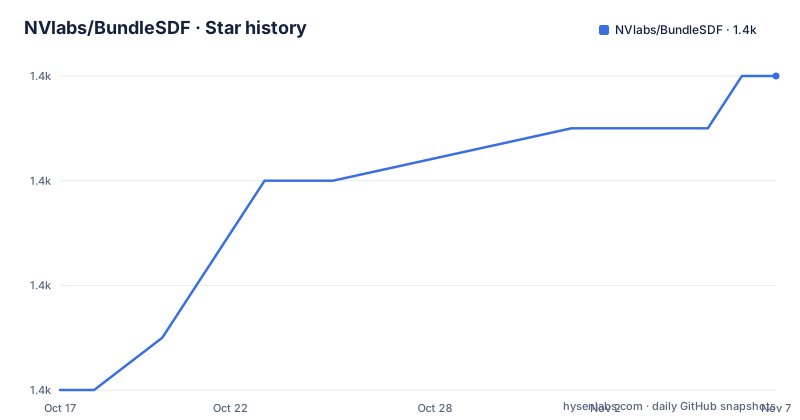
Star history
- NVlabs/BundleSDF1,428 ★ · +6
| Repository | 2026-10-17 | 2026-11-07 |
|---|---|---|
| NVlabs/BundleSDF | 1.4k | 1.4k |
6 Stars in the last 21 days, measured from the daily GitHub snapshot. Compare with other projects
Editorial analysis
What the method does, in the authors' words
BundleSDF is a near real-time method for 6-DoF tracking of an unknown object from a monocular RGBD video sequence, while simultaneously performing neural 3D reconstruction of the object.
The constraints in that sentence are the interesting part, because they are what distinguish the work from a system that needs a model of the object in advance. The method works for arbitrary rigid objects, even when visual texture is largely absent. The object is assumed to be segmented in the first frame only. No additional information is required, and no assumption is made about the interaction agent, so nobody has to be holding or nudging the object in a controlled way.
The key to the method, as the abstract puts it, is a Neural Object Field that is learned concurrently with a pose graph optimization process, in order to robustly accumulate information into a consistent 3D representation capturing both geometry and appearance. A dynamic pool of posed memory frames is automatically maintained to facilitate communication between these two threads.
So the architecture is two loops running at once. The tracking loop maintains a pose graph over the frames, and the reconstruction loop maintains a learned representation of the object, and the memory frame pool is how information moves between them. That coupling is the contribution, and it is why the two cannot simply be separated into a tracker followed by a reconstructor.
The paper was published at CVPR 2023, with the project page, the arXiv entry and a supplemental video linked from the README, and the code is by NVIDIA Labs with Bowen Wen as the contact.
The data you have to assemble
The data section is where most of the practical friction lives, and the README is specific about the structure your folder has to have.
root
  ├──rgb/    (PNG files)
  ├──depth/  (PNG files, stored in mm, uint16 format. Filename same as rgb)
  ├──masks/       (PNG files. Filename same as rgb. 0 is background. Else is foreground)
  └──cam_K.txt   (3x3 intrinsic matrix, use space and enter to delimit)
Four things to note. The depth images are PNG files holding millimetres in an unsigned 16 bit format, which is what depth cameras typically produce but is not what most image libraries expect, so a conversion step is usually needed. The masks are PNG files whose names match the colour frames, and zero is background with anything else being foreground. The intrinsics live in a text file as a 3 by 3 matrix delimited by spaces and newlines. And the directory names are fixed, since the code reads them.
The pretrained weights are separate. There is a segmentation network whose weights go under a specific path inside the BundleTrack tree, and there are the LoFTR outdoor checkpoint weights, which go under the LoFTR weights directory. The LoFTR model is the feature matcher that makes the tracking work on largely untextured surfaces.
For the HO3D dataset, the README provides augmented data and the YCB-Video object models, and asks you to set the root path in a data reader script. The expected directory layout for that dataset is a version folder with evaluation, models and masks directories inside it.
An example recording of a milk jug is linked for testing, which is the fastest way to check that the whole pipeline runs before you assemble your own data.
The container, and the compile step inside it
The environment setup is a Docker image, and the reason for building it rather than installing packages is visible in the repository layout, which contains a CUDA extension directory of its own.
The build is one command from the docker directory, and it uses the network host mode, which is usually needed for the CUDA toolkit downloads during the image build.
cd docker
docker build --network host -t nvcr.io/nvidian/bundlesdf .
Then a container is started for the first time with a script in the same directory, and inside the container the machine dependent packages are compiled.
cd docker && bash run_container.sh

# Inside docker container, compile the packages which are machine dependent
bash build.sh
That second step is the one to note. Some parts of the project have to be compiled against the specific machine, and the build script at the repository root is what does that. The README says this only needs to be done once, but it does need to be done, and the image alone is not enough to run the code.
This is a normal arrangement for a research codebase with CUDA extensions, and it is worth understanding that the container is the environment and the compile step is a separate, machine-specific step inside it. A second machine means a second compile, and a mismatch between the image and the hardware is a common first failure.
Running on your own video, in three steps
The custom-data instructions first run tracking and reconstruction, then refine the mesh; an optional third step draws the pose bounding box.
The first step runs the joint tracking and reconstruction over the video.
python run_custom.py --mode run_video --video_dir /home/bowen/debug/2022-11-18-15-10-24_milk --out_folder /home/bowen/debug/bundlesdf_2022-11-18-15-10-24_milk --use_segmenter 1 --use_gui 1 --debug_level 2The second step is global refinement, a post-processing pass that refines the mesh.
python run_custom.py --mode global_refine --video_dir /home/bowen/debug/2022-11-18-15-10-24_milk --out_folder /home/bowen/debug/bundlesdf_2022-11-18-15-10-24_milkThe third is optional and draws the oriented bounding box to visualise the pose, in the same spirit as the demonstration video.
python run_custom.py --mode draw_pose --out_folder /home/bowen/debug/bundlesdf_2022-11-18-15-10-24_milkThe results are dumped into the output folder, and the README names them: the tracked poses are stored in a subdirectory called ob_in_cam, and the reconstructed mesh with texture is written as a textured mesh file in the wavefront object format.
One assumption is called out explicitly, that the maximum relevant depth in the demo data is under one metre, and if that is not the case in your data you change it in the configuration file. That is a scale assumption in the depth handling, and it is the kind of thing that produces a quietly wrong reconstruction rather than an error.
The segmentation component that is deliberately absent
There is a paragraph in the data section that says more about how this project is maintained than any of the instructions around it.
Due to licence issues, the authors are not able to include XMem in this codebase for running segmentation online. If you are interested in doing so, you are asked to download the code separately and add a wrapper in the segmentation utils module.
So the segmenter that the pretrained weights belong to is not in the repository, and the code that drives it online is a wrapper you have to write. The use_segmenter flag in the run command exists because the segmentation can be turned on and off, and the documentation implies that turning it off is a supported configuration, presumably when the masks are already computed or the frames are already tracked.
This is a licensing constraint rather than an engineering one, and it is worth understanding before you plan the work. The data download section asks you to place the segmentation network weights at a path inside the BundleTrack tree, so the weights are expected to be there, and the module that uses them is expected to be added by you.
It is also a reminder of the general shape of this repository. It is a research implementation with a specific set of dependencies, some of which are pinned to locations, and the packaging is arranged so that the parts with awkward licences are fetched rather than shipped.
Running on HO3D, and the alternative to a two stage pipeline
The dataset path is a separate pair of commands, one to run the method and one to benchmark the output.
python run_ho3d.py --video_dirs /mnt/9a72c439-d0a7-45e8-8d20-d7a235d02763/DATASET/HO3D_v3/evaluation/SM1 --out_dir /home/bowen/debug/ho3d_ours

# Benchmark the output results
python benchmark_ho3d.py --video_dirs /mnt/9a72c439-d0a7-45e8-8d20-d7a235d02763/DATASET/HO3D_v3/evaluation/SM1 --out_dir /home/bowen/debug/ho3d_ours
The separation is worth noticing, because the run and the benchmark are separate commands, so an existing run can be scored again.
The alternative to this project is the obvious one, and the difference is architectural rather than a matter of quality. A conventional pipeline estimates the pose of the object over the sequence and then runs a separate reconstruction step on the posed frames. The two stages are optimised separately, the tracker sees only the frames, and the reconstruction inherits whatever drift the tracker accumulated.
BundleSDF removes that seam. The pose graph optimisation and the neural field are learned together, and the memory frame pool is the mechanism through which the reconstruction informs the tracking and vice versa. The abstract states that this is what lets the method handle large pose changes, partial and full occlusion, untextured surfaces and specular highlights, and that it significantly outperforms existing approaches on HO3D, YCBInEOAT and BEHAVE.
The cost of that coupling is that the system is a single machine with a global optimisation in it. It is not a component you can drop into an existing tracker, and the refinement pass at the end is a post-processing stage over the whole sequence rather than an incremental update.
The state of the repository and who should use it
Three practical notes about the project as it stands.
The first is the release situation. The repository has no tagged releases, and the last push was on 2026-05-01, so the code is being worked on but the version history is in the commit log rather than in the releases. For a research implementation that is the normal arrangement, but it means there is no way to pin a version the way you would pin a library.
The second is the licence, which GitHub could not classify, with a licence file at the root. For a research codebase that ships pretrained weights and a build around a container image, the terms of those artefacts are as important as the terms of the code, and the weights in this project are distributed through separate links rather than through the repository, which is a deliberate arrangement.
The third is what this project is for. It is a research implementation of a specific paper, with a specific pipeline, evaluated on specific datasets. The code that matters most for understanding it is the bundle tracking directory, the neural radiance field helpers and runner, the pose configuration files, and the CUDA extension. The parts a robotics team might want, a general pose estimator for an unknown rigid object from RGBD video, exist, but the repository is arranged for reproducing the paper's results rather than for being a maintained library.
So the right question is whether you want to reproduce or extend the method. If you do, the container, the compilation step and the data layout are all documented well enough to get there, and the first thing to do is build the image and run it on the example milk data before touching anything else.
Editorial conclusion
Adopt BundleSDF if you are working on 6-DoF pose estimation for objects you have never seen before and you want the reconstruction built jointly with the tracking rather than afterwards, because that coupling is what the paper contributes. Do not adopt it as a general reconstruction toolkit, since the pipeline is shaped around a specific research setup and assumes a segmented first frame. Before you run it, read the data layout section, because the depth files must be in millimetres as unsigned 16 bit values and the masks are PNGs whose filenames match the colour frames, and note that the segmentation component is not included in the repository.
Frequently asked questions
What does BundleSDF do?
It is a near real-time method for 6-DoF tracking of an unknown object from a monocular RGBD video sequence while simultaneously performing neural 3D reconstruction of the object, working for arbitrary rigid objects even when visual texture is largely absent, with the object segmented in the first frame only.
What data does BundleSDF expect?
A folder with rgb PNG files, depth PNG files stored in millimetres in uint16 format with matching filenames, mask PNG files where zero is background, and a cam_K.txt file holding the 3x3 intrinsic matrix delimited by spaces and newlines. The pretrained segmentation network weights and the LoFTR outdoor checkpoint go into specific paths inside the BundleTrack tree.
How do I set up the environment for BundleSDF?
Build the image from the docker directory with docker build --network host -t nvcr.io/nvidian/bundlesdf ., start a container with the run_container.sh script, and then run build.sh inside the container to compile the packages that are machine dependent. The README notes the image build can take some time and only needs doing once.
Why is the segmentation component not included in the repository?
The README states that due to licence issues the authors cannot include XMem in the codebase for running segmentation online, and asks anyone interested to download the code separately and add a wrapper in segmentation_utils.py. The pretrained segmentation weights are still expected at the documented path.
Official sources
Add this badge to your README
If you maintain this project, the badge below links readers to this analysis and shows its maintenance status from the daily GitHub snapshot. Paste the markdown into your README; add ?metric=license or ?metric=stars to the image URL for a different field.

[](https://hysenlabs.com/projects/nvlabs-bundlesdf)Star history chart for your README
[](https://hysenlabs.com/projects/nvlabs-bundlesdf)Was this useful?