markondej/fm_transmitter: Raspberry Pi FM broadcasting with GPIO4
Raspberry Pi as FM transmitter
At a glance
- What is it?
- markondej/fm_transmitter turns a Raspberry Pi into a narrowband FM transmitter using its clock output and an antenna attached to GPIO4. It supports WAV files, standard input, live microphone input, DMA, and GPIO21 builds for some Raspberry Pi 4 configurations.
- Who is it for?
- Adopt this project for a local Raspberry Pi FM transmission experiment when an unlicensed frequency is permitted in your jurisdiction and the hardware model is supported. Do not adopt it for Raspberry Pi 5, broadcast licensing, or environments where its undocumented licensing terms are unacceptable.
- Can I use it commercially?
- Not without permission. GitHub finds no licence file in the repository, and without a licence all rights are reserved by default: you may read the code but not reuse it. Check the README, or ask the authors, before using it.
- Is it still maintained?
- Yes. The repository last received commits 1 day ago.
- What is it written in?
- Mainly C++, according to GitHub's language statistics.
Answers come from the project's GitHub data, last synced on November 7, 2026, and from our analysis. They are not legal advice.
Star history
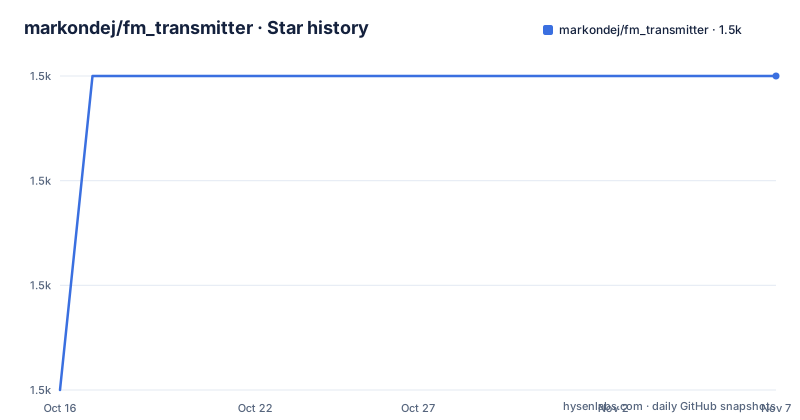
- markondej/fm_transmitter1,497 ★ · +3
| Repository | 2026-10-16 | 2026-11-07 |
|---|---|---|
| markondej/fm_transmitter | 1.5k | 1.5k |
3 Stars in the last 22 days, measured from the daily GitHub snapshot. Compare with other projects
Editorial analysis
GPIO4 FM transmission on Raspberry Pi
markondej/fm_transmitter addresses a narrow but concrete problem: sending an audio signal from a Raspberry Pi over a short FM radio link without a conventional FM transmitter. It is intended for experimenters, developers, and hobbyists who already have an FM receiver and need a simple software-controlled broadcaster. The README says boards up to Raspberry Pi 4 are supported. Raspberry Pi 5 is explicitly excluded because it uses a different peripheral chip.
The output depends on a physical wire connected to GPIO4, identified in the README as pin 7 on the GPIO header. The suggested wire is 20 to 40 cm long and acts as the antenna. The software varies a Raspberry Pi general clock output to create frequency-modulated radio communication. It therefore does not feed audio into a conventional audio codec or radio transmitter. Audio controls the timing or frequency behavior of the generated RF signal.
This approach is most appropriate for receiving the signal nearby. The project does not document an output-power measurement, supported antenna design beyond the suggested plain wire, regulatory compliance procedure, or reception distance. The README also warns that transmitting on some frequencies may require special permission depending on the country. That legal note is not optional operational guidance: a technically working signal can still be unlawful to radiate.
WAV, stdin, microphone, and DMA data paths
The executable accepts an uncompressed WAV file as a positional input. It also accepts standard input, which gives the project a larger role than a fixed sample player. The sample command uses `acoustic_guitar_duet.wav`, but the program can use another WAV file. Supported defaults include 100.0 MHz for frequency and 100 kHz for bandwidth. The `-d` option selects a DMA channel, with channel 0 as the default and 255 disabling DMA so the CPU handles transfer. The `-r` option loops playback.
Live input is possible by piping `arecord` into the transmitter with `-` as the input path. General audio output is documented through the ALSA `snd-aloop` module, allowing another audio stream to feed the FM process. These paths rely on correct ALSA device selection, mono capture, 22050 Hz sampling, and signed 16-bit little-endian audio in the shown commands.
The repository layout supports this split into distinct components. `wave_reader.cpp` and `wave_reader.hpp` handle file input, while `transmitter.cpp` and `transmitter.hpp` contain the transmission logic. `mailbox.c` and `mailbox.h` provide the low-level mailbox interface. The `Makefile` links `mailbox.o`, `wave_reader.o`, `transmitter.o`, and `fm_transmitter.o` with the math and pthread libraries. This is a compact C and C++ codebase built with C++11 flags, rather than a daemon with a documented service configuration or management API.
Build and first WAV broadcast on Raspberry Pi
The documented installation begins with the build dependencies. These commands update the package index and install `make` plus the compiler toolchain.
sudo apt-get update
sudo apt-get install make build-essential
Next, clone the repository and enter its directory. The README says to build the executable with `make`.
git clone https://github.com/markondej/fm_transmitter
cd fm_transmitter
make
A successful build should produce the `fm_transmitter` executable. The `Makefile` names that binary and uses the listed object files. Its version variable is `0.9.7`, even though the available release history names `0.9.4` as the latest listed release. That difference matters when auditing provenance: the repository does not explain whether the Makefile value corresponds to a published release.
Attach a 20 to 40 cm plain wire to GPIO4 on pin 7 before broadcasting. Then start the included sample at 100.6 MHz.
sudo ./fm_transmitter -f 100.6 acoustic_guitar_duet.wavAccording to the README, tune an FM receiver to the selected frequency and the playback should become audible. The program requires elevated privileges for this command because it accesses Raspberry Pi hardware facilities. This first run is useful as a basic signal-path check, but the documentation gives no pass or fail calibration procedure and does not document how to confirm compliance.
GPIO21 workaround for Raspberry Pi 4 interference
The Raspberry Pi 4 section documents a specific compatibility problem. Other built-in hardware may interfere with transmission, making some standard FM broadcasting frequencies unusable. The README offers several responses, including a GPIO21 build, CPU frequency settings, and lower frequencies. The GPIO21 build changes the output pin used by the project.
make GPIO21=1GPIO21 is identified as pin 40 on the GPIO header. The `Makefile` confirms that setting `GPIO21` adds the `-DGPIO21` preprocessor definition. A build that does not set this variable uses the normal GPIO4 path.
The CPU governor workaround changes CPU0's scaling governor to `powersave`.
echo "powersave"| sudo tee /sys/devices/system/cpu/cpu0/cpufreq/scaling_governorThis command changes a host-level CPU setting rather than a project configuration file. The README also describes setting ARM minimum and maximum frequencies to the same value, but the repository excerpt does not provide exact commands for that alternative. It further recommends trying frequencies below 93 MHz when the interference problem occurs.
These workarounds are not presented as a universal Raspberry Pi 4 setup. The documentation says to use them when built-in hardware interferes. Their effects on system performance, power consumption, and frequency stability are not documented, so they should not be treated as a guaranteed profile for production transmission.
Live microphone and ALSA loopback inputs
For live microphone input, the README connects `arecord` to standard input. This requires an ALSA capture device matching the hard-coded device example in the command. The transmitter receives the stream through `-`.
arecord -D hw:1,0 -c 1 -d 0 -r 22050 -f S16_LE | sudo ./fm_transmitter -f 100.6 -The documented settings request one channel, a 22050 Hz rate, and `S16_LE` format. If playback suffers a performance drop, the README suggests using the ALSA plug device instead.
arecord -D plughw:1,0 -c 1 -d 0 -r 22050 -f S16_LE | sudo ./fm_transmitter -f 100.6 -For use as a general audio output, the project relies on `snd-aloop`. Load the kernel module, then capture the loopback stream and pipe it to the transmitter.
sudo modprobe snd-aloop
arecord -D hw:1,1,0 -c 1 -d 0 -r 22050 -f S16_LE | sudo ./fm_transmitter -f 100.6 -
The README says the loopback device must be the default ALSA device and that the `hw:X,1,0` notation needs the correct card number. The command shown uses `hw:1,1,0`, so it should not be copied unchanged to every Pi. Neither ALSA setup provides automatic hardware detection. Device numbering and permissions must be checked on the target system.
Uncompressed WAV constraint and conversion paths
The direct input format is uncompressed WAV. The README does not claim support for compressed audio, even though standard input makes conversion pipelines possible. This creates a clear division between what the executable reads and what external tools can prepare. MP3, WebM, and other compressed inputs must first become a compatible WAV stream or file.
For an MP3, the documented dependency command installs SoX and its MP3 format support.
sudo apt-get install sox libsox-fmt-mp3The pipeline below converts `example.mp3` to mono, 22050 Hz, 16-bit WAV and streams it directly to the transmitter.
sox example.mp3 -r 22050 -c 1 -b 16 -t wav - | sudo ./fm_transmitter -f 100.6 -If the transmitter reports `corrupted data`, the README recommends creating a WAV file and playing it in a second command.
sox example.mp3 -r 22050 -c 1 -b 16 -t wav converted-example.wav
sudo ./fm_transmitter -f 100.6 converted-example.wav
FFmpeg is also given as an alternative converter.
ffmpeg -i example.webm -f wav -bitexact -acodec pcm_s16le -ar 22050 -ac 1 converted-example.wav
sudo ./fm_transmitter -f 100.6 converted-example.wav
The feature list says the reader handles mono and stereo files, while the conversion examples normalize inputs to mono. The documentation does not define accepted WAV sample rates, bit depths, channel layouts, or duration limits, so successful conversion alone is not evidence that every WAV profile will work.
Maintenance, licensing, and release boundaries
The repository is not archived, and its last push was on 2026-06-12. That date is recent enough to avoid describing the repository as abandoned, but it does not establish a release cadence or guarantee future hardware support. The listed releases stop at `0.9.4` from 2020-03-31, while the `Makefile` declares `VERSION = 0.9.7`. The repository does not document when or how that version was released.
The repository information identifies the license as unknown. There is no license file among the listed top-level entries. Engineers therefore cannot infer permission to copy, modify, or redistribute the code from this repository description alone. The README includes a legal note about radio transmission, but that does not address software licensing.
The project also has a narrower hardware boundary than the broad phrase Raspberry Pi transmitter might suggest. Raspberry Pi 5 is unsupported because its peripheral chip differs. Older boards through Raspberry Pi 4 are claimed as supported, but individual board revisions, Raspberry Pi OS releases, current kernel versions, and 64-bit environments are not covered by the documentation.
For an engineering decision, the main upgrade cost is hardware and compliance validation rather than package management. This repository has no documented package feed, release archive, container image, or service unit. Users must build from source, connect an antenna, manage ALSA devices, and confirm radio permissions locally. Those constraints make it a focused experimental tool, not a documented turnkey broadcasting platform.
Editorial conclusion
Adopt this project for a local Raspberry Pi FM transmission experiment when an unlicensed frequency is permitted in your jurisdiction and the hardware model is supported. Do not adopt it for Raspberry Pi 5, broadcast licensing, or environments where its undocumented licensing terms are unacceptable. Verify the applicable radio regulations, inspect the license status in the repository, confirm clean reception near your intended antenna placement, and test the exact Raspberry Pi model and audio source before extending the setup.
Frequently asked questions
How do I install and run markondej/fm_transmitter on a Raspberry Pi?
Install `make build-essential`, clone the repository, run `make`, then execute `fm_transmitter` with a frequency and WAV file. The README uses 100.6 MHz and `acoustic_guitar_duet.wav` for its first broadcast.
Can markondej/fm_transmitter use a microphone instead of a WAV file?
Yes. The README pipes mono `S16_LE` audio captured by `arecord` into `fm_transmitter` using `-` as the input path. The correct ALSA capture device must be selected for the target Raspberry Pi.
Does markondej/fm_transmitter support Raspberry Pi 5?
No. The README explicitly says the project works on Raspberry Pi boards up to model 4 and that Raspberry Pi 5 uses a different peripheral chip.
Official sources
Add this badge to your README
If you maintain this project, the badge below links readers to this analysis and shows its maintenance status from the daily GitHub snapshot. Paste the markdown into your README; add ?metric=license or ?metric=stars to the image URL for a different field.

[](https://hysenlabs.com/projects/markondej-fm-transmitter)Star history chart for your README
[](https://hysenlabs.com/projects/markondej-fm-transmitter)Was this useful?