bumblebee-status: a status line for i3 that is mostly configuration
bumblebee-status is a modular, theme-able status line generator for the i3 window manager.
At a glance
- What is it?
- bumblebee-status turns the i3bar status command into a modular, themeable tool where each piece of the bar is a module, the colours are a theme, and every module carries its own dependencies as an optional extra. The documentation lists around two dozen modules, from CPU and memory to a YubiKey indicator.
- Who is it for?
- bumblebee-status fits an i3 user who wants a bar that shows a specific set of things, updated on intervals that differ per item, and who is willing to write a small module when the thing they want to see is not there. It is the wrong tool for a machine that does not run i3, and the wrong tool for somebody who wants their bar to be a shell script, because the library's value is the module catalogue rather than the framework.
- Can I use it commercially?
- Yes. MIT is a permissive licence: you can use, modify and sell software built on it, as long as you keep its copyright and licence notices.
- Is it still maintained?
- Yes. The repository last received commits 36 days ago.
- What is it written in?
- Mainly Python, according to GitHub's language statistics.
Answers come from the project's GitHub data, last synced on November 7, 2026, and from our analysis. They are not legal advice.
Star history
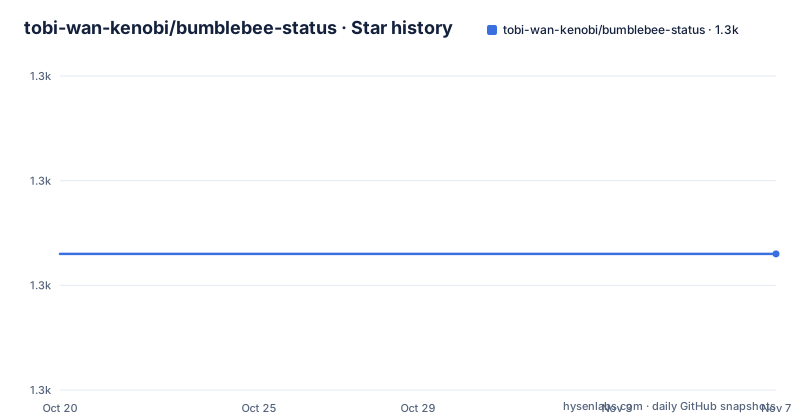
- tobi-wan-kenobi/bumblebee-status1,283 ★ · +0
| Repository | 2026-10-20 | 2026-11-07 |
|---|---|---|
| tobi-wan-kenobi/bumblebee-status | 1.3k | 1.3k |
0 Stars in the last 18 days, measured from the daily GitHub snapshot. Compare with other projects
Editorial analysis
A status line, a module catalogue and a theme
bumblebee-status is a modular, theme-able status line generator for the i3 window manager, and it is one of those tools whose documentation is more instructive than its code.
The stated focus is three things. Ease of use with sane defaults and no mandatory configuration file, so that the bar works before you have configured anything. Easy creation of custom themes. And easy creation of custom modules. The ordering matters, because a status line is a piece of the daily working environment, and a tool that makes you configure it before it shows anything is a tool that gets abandoned.
The three focus points map onto the three layers of the project. The modules are the pieces of information, the themes are the colours and the icons, and the framework is the part that assembles them. The documentation has separate pages for writing a module and for writing a theme, and the repository has a `themes/` directory and a `bumblebee_status/` package to match.
Two requirements are worth knowing before you install. The i3wm version has to be 4.12 or later, because in earlier versions blocks do not have background colours, which removes most of what the powerline themes are for. And the supported FontAwesome version is 4, because the free version of 5 does not include some of the icons the themes use.
The Python versions listed in the README are 3.4 through 3.9, which is a conservative statement for a project whose last release was in 2025 and whose last commit was on 2026-10-03. The project is MIT licensed, the default branch is `main`, and the README explains why, with a link to the ZDNet piece on GitHub replacing the word master. The recent releases are v2.3.0 from 2025-07-06, v2.2.0 from 2023-10-01 and v2.1.6 from 2022-09-17, and the documentation is published on Read the Docs.
The i3 configuration is one line
The integration with i3 is a single status command in the bar block, and the example in the README is the whole of it.
bar {
	status_command <path>/bumblebee-status -m cpu memory battery time \
		pasink pasource -p time.format="%H:%M" -t solarized
}
Three flags do the work. `-m` is the list of modules, here CPU, memory, battery and time plus the `pasink` and `pasource` modules that read the output of the PulseAudio sink and source. `-p` is the list of parameters, in this case the format for the time module. And `-t` is the theme.
A fuller configuration in the README shows what a real bar looks like, and it is worth reading because it shows the parameters doing most of the work:
bar {
	font pango:Inconsolata 10
	position top
	tray_output none
	status_command ~/.i3/bumblebee-status/bumblebee-status -m nic disk:root cpu \
		memory battery date time pasink pasource dnf \
		-p root.path=/ time.format="%H:%M CW %V" date.format="%a, %b %d %Y" \
		-t solarized-powerline
}
The module list here names a disk module twice with different aliases, `disk:root`, a format string with a week number and a locale-aware date format, and the `solarized-powerline` theme, which is one of the themes that needs the extra font.
The last line of that section is the whole installation process for a user of i3: restart i3wm and that is it.
The tool can also tell you what it can do, which is the fastest way to explore it:
$ cd bumblebee-status
$ ./bumblebee-status -l themes
$ ./bumblebee-status -l modules
The `-l` flag lists the available modules with their parameters, or the available themes, and the documentation links to the same lists.
Intervals and aliases, per module
The parameter system is where the tool stops being a fixed bar and becomes a configurable one, and it has two features that are worth understanding separately.
The first is per-module update intervals. The global interval is set with a parameter:
$ ./bumblebee-status -m <list of modules> -p interval=<interval in seconds>And each module can override it, which is the feature that matters in practice:
$ ./bumblebee-status -m cpu memory -p cpu.interval=5s memory.interval=1mA memory reading every minute and a CPU reading every five seconds is the right shape for a bar, and the parameters are namespaced by module name, so a module can carry its own settings without colliding with another.
The second is aliases. All modules can be given an alias using the `<module name>:<alias>` form, by which they can be parametrized:
$ ./bumblebee-status -m disk:root disk:home -p root.path=/ home.path=/homeSo the disk module appears twice in the same bar, once reporting the root filesystem and once reporting the home directory, and the alias is what tells the parameters which instance they belong to. Without that, a module that can appear more than once would have no way to accept different parameters, and the alias is the smallest possible solution to that problem.
The README makes the same point in the parameters list, since the same notation is used for the module list and the parameter list, and the names line up: the alias in `-m` and the prefix in `-p`.
So the model is: a module produces a value, an alias names one instance of it, parameters configure instances, and a theme decides how all of it is drawn.
Themes, and the FontAwesome 4 constraint
The themes are the visible part of the project, and the repository topics give a good sense of the range: gruvbox, nord, powerline and solarized, plus the screenshot in the README shows the Solarized powerline variant.
The documentation links a list of themes, and the theme documentation explains how to write one. The interesting constraint is the icon set. The supported FontAwesome version is 4, because the free version of 5 does not include some of the icons, and the powerline themes need something else as well: a powerline-compatible font, from the powerline fonts project.
That gives two classes of theme. A plain theme needs only the icon set, which is a matter of installing a font package. A powerline theme needs the extra font as well, because the separators and the triangles that make the powerline look are glyphs rather than drawn characters.
It is a small thing, and it is the kind of detail that separates a theme system that works from one that half works on a fresh machine. The README is explicit that some themes, all of the powerline ones as the example says, require Font Awesome and a powerline-compatible font, and the module list documents the dependencies of each module in the same spirit, listing the Python modules and the external executables that module needs.
That last point is the theme of the whole dependency story, and the next section is about it: in this project a dependency belongs to a module, not to the tool.
Dependencies belong to modules, not to the tool
The dependency model is the part of this project that is genuinely well designed, and it is visible in the packaging.
The available modules documentation lists the dependencies, both Python modules and external executables, for each module, and the note is that if you are not using a module, you do not need the dependencies. The setup file implements exactly that: it reads a base requirements file for the core, and then a map of extras, one per module, each pointing at its own requirements file.
The map covers the catalogue: `battery-upower`, `cpu`, `cpu2`, `currency`, `docker_ps`, `getcrypto`, `git`, `github`, `layout-xkb`, `memory`, `network_traffic`, `nic`, `pihole`, `rss`, `spaceapi`, `spotify`, `stock`, `sun`, `system`, `taskwarrior`, `title`, `traffic`, `weather` and `yubikey`.
So a bar that shows the CPU and the clock installs the core and nothing else, and a bar that shows a YubiKey indicator, a stock quote or a Docker container list pulls in only the extra it needs. For a tool that runs on every window manager reload, that matters, because the alternative is a single dependency list that is the union of every module and is therefore the union of every module's worst case.
The repository supports the same discipline in the tests, with a `requirements/` directory holding the base file and one file per module, a `generate-base-tests.py` script at the root that suggests the base requirements are generated, and a `coverage.sh` script for the coverage run.
The version of the package itself comes from versioneer, the `versioneer.py` file at the root, which derives the version from the git metadata rather than from a number that has to be remembered to be bumped.
Packaging for five distributions, and the last two of them
The install section is a good picture of how a Linux desktop tool actually gets onto machines, because it lists five different answers to the same question.
From git, for a development snapshot, it is a clone of the repository. From the AUR, it is a clone of the AUR package and a `makepkg -sicr`. From PyPI, thanks to a contributor, it is a `pip install --user bumblebee-status`, which installs the command into `~/.local/bin/bumblebee-status`. There is also a SlackBuild available in the Slackbuilds repository, and an ebuild for Gentoo in the gallifrey overlay, with instructions for adding the overlay.
And it is in nixpkgs in the unstable channel, with a snippet that shows how to select the plugins you want:
{
  environment.systemPackages = with pkgs; [
      (bumblebee-status.override{plugins = p:[p.cpu];})
  ];
}
The `plugins` override there is the same model as the Python extras, expressed in Nix, and the README says to replace `[p.cpu]` with the list of plugins you want. So a Nix user gets the same fine-grained control over what gets installed that a pip user gets from the extras.
The packaging machinery in the repository matches the five routes. There is a `PKGBUILD.template` and a `create-pkgbuild.py` script, which is how the AUR package is generated from the template rather than by hand, and there is a `man/` directory for the manual page.
The two most recent distribution routes are the ones a new user is most likely to meet, and the interesting detail is the order in which the README lists them. Git and the AUR come first, because they are the ones a person who reads the README is likely to want, and PyPI comes after them with the contributor thanked, which is the correct order of credit.
Where bumblebee-status is the wrong tool
The limits are visible in the requirements, and they are sharper than the project would put it.
The first is that this is an i3 tool. It generates the output for the i3bar status command, and while the output is text, the configuration model, the themes, the module parameters and the aliases are all built around that bar. A user of another window manager, or of a desktop environment with its own panel, gets nothing here, and the honest answer is that the bar belongs to the window manager and the panel plug-ins own the rest.
The second is the version floor on i3wm itself. The requirement is 4.12 or later, because in earlier versions blocks do not have background colours, and without those colours the powerline themes lose the thing that makes them worth using. So the tool is only fully itself on a reasonably recent i3, and a user on an older distribution is either stuck with the flat themes or is behind two distributions.
The third is that a module catalogue is a maintenance commitment for the maintainer, and the list in the setup file is a good illustration of the shape of that work. A weather module, a currency module, a stock module, a Spotify module, a Docker container list, a YubiKey indicator, a pihole module and a taskwarrior module are each a small integration with an external program or service, and each one is a thing that can break when the external program changes its output format. The project handles this by making the modules optional and by documenting the dependencies, and the cost of the approach is paid by whoever maintains the module.
The alternative, for a user who wants three things on their bar, is a shell script in the status command, which is what most i3 configurations do by default and which has no dependencies at all. The difference in approach is that bumblebee-status is a framework with a catalogue and a theming system, and a shell script is one file that does exactly what its author needs. For a person who wants a status line that grows with their configuration, the framework earns its place. For a person who wants a battery icon and a clock, it is a lot of installation for a lot of Python.
Editorial conclusion
bumblebee-status fits an i3 user who wants a bar that shows a specific set of things, updated on intervals that differ per item, and who is willing to write a small module when the thing they want to see is not there. It is the wrong tool for a machine that does not run i3, and the wrong tool for somebody who wants their bar to be a shell script, because the library's value is the module catalogue rather than the framework. Before installing, check the two hard requirements, i3wm 4.12 or later for background colours on blocks and FontAwesome version 4 for the icons, and read the module list to see whether the dependency each one pulls in is a dependency you already accept, because a module that is not used is not installed at all.
Frequently asked questions
How do I install bumblebee-status?
With `pip install --user bumblebee-status` from PyPI, which installs the command into `~/.local/bin/bumblebee-status`. A development snapshot can be cloned from git, and there are also packages in the AUR, in SlackBuilds, a Gentoo ebuild in the gallifrey overlay, and nixpkgs unstable.
How do I configure bumblebee-status in my i3 bar?
Point the bar's status_command at the binary and use -m for the list of modules, -p for the parameters and -t for the theme, then restart i3wm. The command `./bumblebee-status -l modules` and `-l themes` list what is available.
Can I set a different update interval per module?
Yes. The global interval is set with `-p interval=<seconds>`, and each module can override it with a namespaced parameter, for example `-p cpu.interval=5s memory.interval=1m`.
Which fonts and icons does bumblebee-status need?
The powerline themes require Font Awesome and a powerline-compatible font, and the project targets FontAwesome version 4 because the free version of 5 does not include some of the icons. It also requires i3wm 4.12 or later, since earlier versions do not give blocks background colours.
Official sources
Add this badge to your README
If you maintain this project, the badge below links readers to this analysis and shows its maintenance status from the daily GitHub snapshot. Paste the markdown into your README; add ?metric=license or ?metric=stars to the image URL for a different field.

[](https://hysenlabs.com/projects/tobi-wan-kenobi-bumblebee-status)Star history chart for your README
[](https://hysenlabs.com/projects/tobi-wan-kenobi-bumblebee-status)Was this useful?