Hayroo is a two folder e-commerce project that deploys from its own branch
Full-featured MERN Stack E-commerce platform with payment gateway using React, Node.js, Express, MongoDB, JWT, and Tailwind CSS
At a glance
- What is it?
- Hayroo is a MERN stack shop with the front end in a `client/` folder and the API in a `server/` folder, payments handled through Braintree and authentication through JWT. The most instructive part of its documentation is not the feature list but the deployment walkthrough, which shows a repository whose production configuration lives on a separate branch with its own environment file.
- Who is it for?
- Hayroo suits a developer who wants a readable reference for how a React and Express shop is wired together, with JWT authentication, a Braintree checkout and a MongoDB layer, and it suits someone who wants to see a deployment described step by step rather than through a platform's own automation.
- Can I use it commercially?
- Not without permission. GitHub finds no licence file in the repository, and without a licence all rights are reserved by default: you may read the code but not reuse it. Check the README, or ask the authors, before using it.
- Is it still maintained?
- Yes. The repository last received commits 126 days ago.
- What is it written in?
- Mainly CSS, according to GitHub's language statistics.
Answers come from the project's GitHub data, last synced on November 7, 2026, and from our analysis. They are not legal advice.
Star history
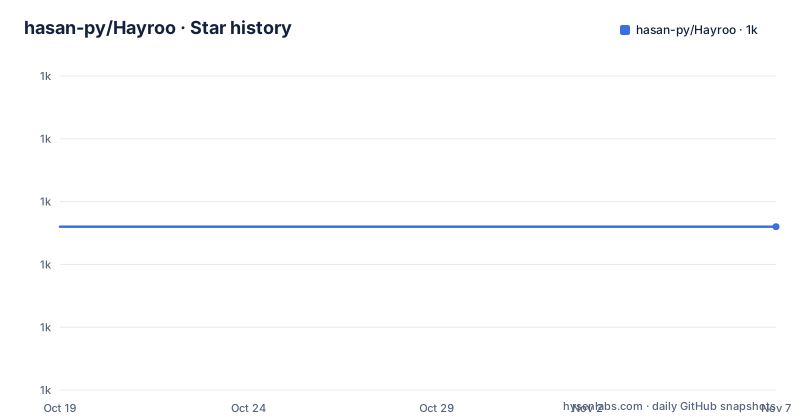
- hasan-py/Hayroo1,013 ★ · +0
| Repository | 2026-10-19 | 2026-11-07 |
|---|---|---|
| hasan-py/Hayroo | 1k | 1k |
0 Stars in the last 19 days, measured from the daily GitHub snapshot. Compare with other projects
Editorial analysis
Two folders, one repository, one npm install each
The top level of the repository contains almost nothing: a `.gitignore`, a `README.md`, an `assetREADME.md/` folder of images, and the two application folders, `client/` and `server/`. That split is the architecture. The client is the React front end, styled with Tailwind CSS, and the server is the Express and Node.js API that talks to MongoDB and authenticates with JWT, and the payment step goes through Braintree. There is no monorepo tooling in the tree, no workspace file and no shared package, so the two halves are installed and run independently, which is a simple arrangement to understand and a simple one to get wrong, because nothing enforces that the two sides agree on a version. The prerequisite the documentation states is npm or yarn and Node.js installed, and that is the entire toolchain requirement.
The .env file decides what the server can do
The configuration story begins in the `server` folder, where the `.env` file holds the credentials the API needs. The documentation is direct about one thing: use your own API key for future use, because the key that ships in the repository may not work in the future. That is an honest warning about a checked in secret, and it is the kind of thing you should fix on day one rather than discover later. The payment settings are three variables:
BRAINTREE_MERCHANT_ID=your_id
BRAINTREE_PUBLIC_KEY=your_public_key
BRAINTREE_PRIVATE_KEY=your_private_key
The rest of the server configuration is the database connection, which is the `DATABASE` variable, and that one has two forms, a local MongoDB URL for development and a hosted one for deployment. That single variable is the pivot the whole deployment section turns on, and the difference between the two forms is where most of the setup friction in the project lives.
Getting the Braintree keys is a five minute sandbox exercise
The payment side cannot run without credentials, and the documentation walks through obtaining them in six steps. You go to the Braintree payments site, create a free sandbox account at the sandbox gateway, log in and navigate to Account, then Settings, then API, then API Keys. If no key exists you click the button to generate one, and the credentials you copy out are the merchant ID, the public key and the private key. Those three values go into the `.env` file inside the `server` folder, in the form shown above. The important detail is that this is a sandbox account, which is what you want for a project you are running locally, and that the private key belongs on the server only. The three values are kept as separate variables rather than bundled into one secret.
Running locally means two terminals and two scripts
The install step is two installs, one per side. From the project directory, the client goes first:
cd client && npm installand then the server:
cd server && npm installRunning it is the same idea. The documentation asks you to open a terminal in the server directory and run:
npm run start:devThen a second terminal in the client directory, with:
npm run startAfter that the web app is at http://localhost:3000/. The presence of a `start:dev` script on the server rather than a plain `start` suggests a development mode with reload, and the separate client start script is the usual React development server. Nothing in the documentation describes what to do when a script name differs from these, so the script names in the two `package.json` files are the contract you depend on, and they are not printed anywhere in the README.
Production configuration lives on a branch of its own
The deployment walkthrough is the most specific part of the documentation and it starts with an unusual instruction: create a Render account, connect your GitHub account, create a new Web Service, and add the repository, which has to keep the same folder structure with the front end and the back end in one place. Then the instruction that explains the whole arrangement, every change for the deployment goes into the `render-deploy-backend` branch, and the `.env` file on the `master` branch is not to be changed. So the project is maintained in two lines at once. The code lives on `master`, and the configuration that Render builds from lives on `render-deploy-backend`, and the two can drift apart without either the developer or the hosting platform noticing. The final step in the setup is to point the Web Service at that branch rather than at `master`, and the front end can be deployed separately to Vercel or Netlify.
The database moves from localhost to an Atlas cluster
Because the deployment does not create a database server, the `DATABASE` variable has to point at a hosted MongoDB. The documentation gives the shape of the local value, `DATABASE=mongodb://127.0.0.1:27017/ecommerce`, and the shape of the hosted one, `DATABASE=mongodb+srv://myusername:[email protected]/ecommerce?retryWrites=true&w=majority`, and the change is made in the `.env` file on the `render-deploy-backend` branch. The URL is not a literal to copy: the documentation says your own will be different, and it is found in the connect settings of the database in the Atlas console. The trap it warns about is a common one, the password in a cluster URL is the cluster password, not the account password, and the cluster password lives in the database access menu. The screenshots in the asset folder cover the connection string, the cluster password and the network access screen, which are the three places a newcomer gets stuck.
What the documentation leaves out, and what it mixes in
Two observations close out the picture. The first is about the repository's own state. No licence is stated for the code, there are no GitHub releases, and the last push to the repository was on 2026-07-04, so a reader has no version to pin and no clear permission to reuse the code. The README also has a typo, referring once to `.evn` where it means `.env`, which is the kind of detail that costs a beginner an hour. The second observation is about what the README promotes at the top. The banner at the head of the file advertises a course series on building a learning management system with React, Node, PostgreSQL and Redis, with four parts and a deployment part, and the thumbnail and the project homepage both point at a YouTube video. That is a different application from the shop in the repository, which is described as a MERN e-commerce platform with Braintree payments, and the mismatch between the video material and the code is worth knowing before you follow the tutorial expecting the two to match.
Editorial conclusion
Hayroo suits a developer who wants a readable reference for how a React and Express shop is wired together, with JWT authentication, a Braintree checkout and a MongoDB layer, and it suits someone who wants to see a deployment described step by step rather than through a platform's own automation. It is a poor fit as a production starting point, because the deployment configuration lives on a branch that has to be maintained separately from the code, and it is a poor fit if you need a clear licence, since the repository states none. Before you build on it, check three things: the state of the `render-deploy-backend` branch against `master`, because the environment file only lives in one of them, whether the Braintree sandbox credentials you insert actually work, since the documentation itself warns that the shipped key may stop working, and the last push to the repository, dated 2026-07-04, with no tagged releases to pin a build to.
Frequently asked questions
How do I run Hayroo locally?
Install the dependencies in both folders with `cd client && npm install` and `cd server && npm install`, then run `npm run start:dev` in the server folder and `npm run start` in the client folder in a second terminal. The app is then served at http://localhost:3000/.
What environment variables does the Hayroo server need?
The payment settings are BRAINTREE_MERCHANT_ID, BRAINTREE_PUBLIC_KEY and BRAINTREE_PRIVATE_KEY, plus a DATABASE variable holding the MongoDB connection string. The documentation asks you to use your own API keys because the ones in the repository may stop working.
How do I get Braintree credentials for Hayroo?
Create a free sandbox account at the Braintree sandbox gateway, then in Account, Settings, API and API Keys, generate a new key if none exists and copy the merchant ID, public key and private key into the .env file inside the server folder.
How is Hayroo deployed?
The server is deployed as a Render Web Service, but the configuration lives on a separate branch called `render-deploy-backend`, with the environment file changed only there and not on master. The front end can be deployed separately to Vercel or Netlify, and the database is a MongoDB Atlas cluster rather than a local MongoDB.
What licence does Hayroo use?
The repository states no licence, and it publishes no GitHub releases. The last push to the repository was on 2026-07-04, so there is no tagged version to pin either.
Official sources
Add this badge to your README
If you maintain this project, the badge below links readers to this analysis and shows its maintenance status from the daily GitHub snapshot. Paste the markdown into your README; add ?metric=license or ?metric=stars to the image URL for a different field.

[](https://hysenlabs.com/projects/hasan-py-hayroo)Star history chart for your README
[](https://hysenlabs.com/projects/hasan-py-hayroo)Was this useful?